

1.12.14

3 Ways to Align Your Appearance with the Law of Attraction
 |
| Image Credit: forbes.com |
Wikipedia defines The Law of Attraction as "the name given to the belief that "like attracts like" and that by focusing on positive or negative thoughts, one can bring about positive or negative results."
There are 3 steps to The Law of Attraction
1) Ask: clearly ask the universe for what you want2) Believe: believe the universe is delivering what you want3) Allow: the most important and difficult step for many people.
This is the step where you need to emotionally feel in alignment with what you've asked for in order for your 'ask' to manifest.
Here's a great quote from the movie 'The Secret' to illustrate what emotional alignment is - "It's really important that you feel good. Because this feeling good is what goes out as a signal into the universe and starts to attract more of itself to you. So the more you can feel good, the more you will attract the things that help you feel good and that will keep bringing you up higher and higher" - Joe Vitale
So what do the appearance choices you are making right now have to do with The Law of Attraction? A lot, because like it or not your appearance choices contribute to the way you feel about yourself and to the vibration you are emitting into the universe.
Here's a great and simple exercise to gauge how your appearance is impacting your point of attraction this moment. Look at yourself honestly in a full length mirror. Really take in your appearance from head to toe (from your hair to your shoes). Do you immediately get a feeling of excitement and joy? Are your eyes more drawn to your face or does your hair and outfit overpower the authentic YOU?
If you are not happy with your responses to the questions from the above exercise, it's time to get your appearance into alignment with the Law of Attraction using these 3 steps:
1. Find out colors for your hair, clothing, accessories and makeup that are in alignment with you. By wearing your right colors you are guaranteed to look younger, healthier, more vibrant and feel great.
Everything in the universe emits an energy vibration, including color. A great holistic practice to test someone's energy vibration as it relates to different colors is Energy Muscle Testing. This is a practice whereby muscles are tested to identify whether thoughts, actions, feelings and things are in vibrational harmony with an individual. When someone is muscle tested wearing colors that are in alignment with them, their muscles are stronger thus giving off a higher energy vibration into the world.
2. Find out hair, clothing and accessory styles that maximize the authentic and best you. Much like wearing your right colors raises your vibration and contributes to your emotional alignment, so does wearing hair, clothing and accessory styles that are in harmony with the best and authentic you.
The key elements of this step is to identify your body silhouette, personality and lifestyle needs. Sometimes it is really hard to take an honest look at ourselves to determine what are needs are in these areas.
3. Implement your color and style needs into your appearance choices. This is the most fun and rewarding step and involves these activities:
• Cleaning out your closet to get rid of items that no longer serve your colour and style needs.• Visiting a hair colorist and stylist to implement your hair colour and style needs.• Visiting a make-up professional to receive training on make-up application that is in alignment with your color and style needs.• Shopping to address wardrobe and accessory gaps you created when cleaning out your closet. You will find that once you know your color and style needs, shopping is so much more easy and efficient.
So now you have 3 steps to getting your appearance into alignment with the Law of Attraction.
What you are feeling in this moment represents your point of attraction and therefore represents what the universe is delivering to you in moments following (your future).
Are your appearance choices contributing to a feeling of excitement and joy with you? If not, there's no time like the present to review your image and ensure you are giving off your best energy.
-XoXo
post credit: huffingtonpost.com
28.11.14
Kitchen Essentials for the New Graduate
 |
| photo credit: huffingtonpost.com |
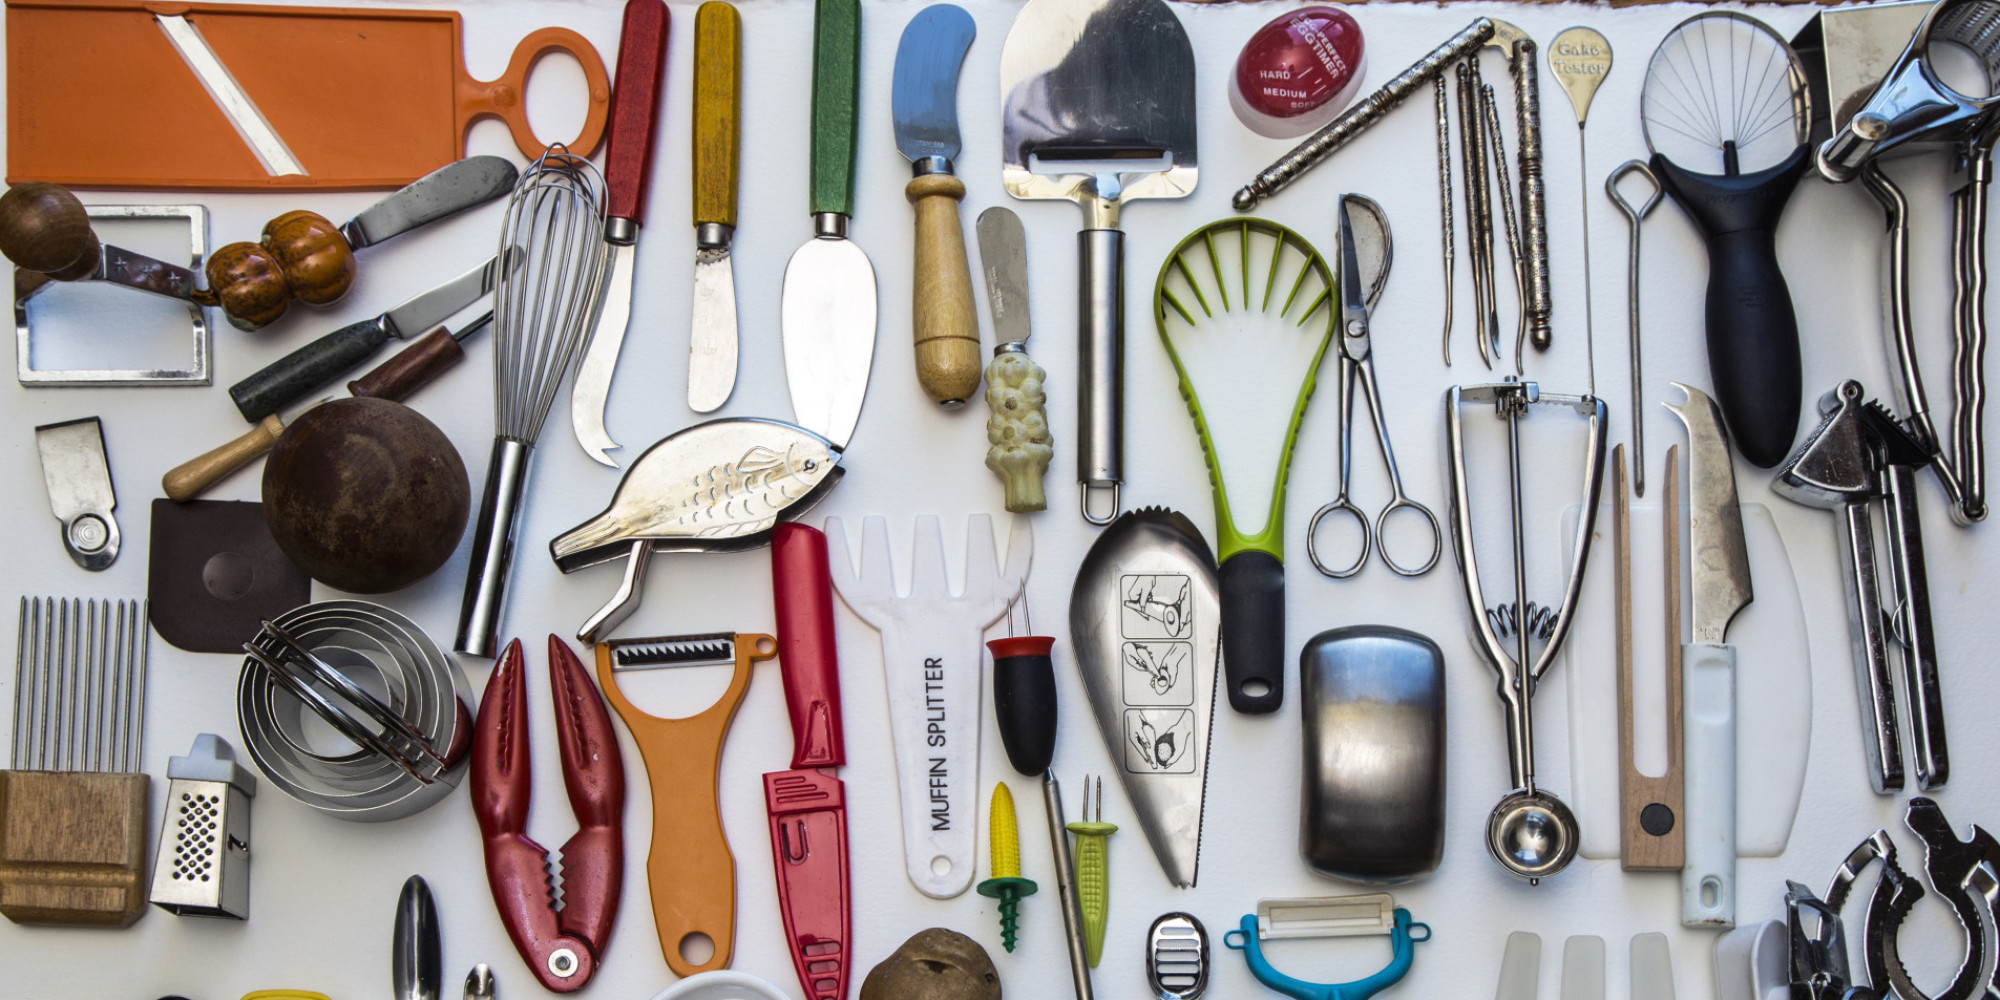
If you or someone near and dear to you is heading off for the first year of college, moving off-campus, or venturing out into the world as a college grad, some basic kitchen gear—tools, pots, pans, plates, and more—makes an excellent and practical graduation gift. At this stage in life, bang for the buck is of utmost importance, and given that kitchen space can be at a premium (especially when shared with roommates), we did our best to track down the most affordable, durable, and well-designed kitchen essentials we could find. Read on for 21 kitchen basics to help you or your grad whip up some scrambled eggs, bake your favorite chocolate chip cookies, and throw a dinner party for friends.
PREPWARE
Knives
Ah, the transformative power of sharpened steel. Whether you're dealing with fruit, vegetables, herbs, or meat, you're going to need to chop, slice, or dice something at some point. The two most important knives in your arsenal are a good-quality chef's knife to tackle the big stuff and a paring knife that can handle the little things. A good knife should feel comfortable and well balanced in your hand.
Cutting Board
A wooden cutting board will be easy on your blades, keeping your knives in tip-top condition. Dedicated cutting boards—one each for meat, seafood, poultry, and produce—are ideal, but not necessarily practical when space and funds are tight. Just be sure to sanitize your board after working with raw meats or seafood, to avoid cross-contamination.
Tools
A well-stocked kitchen ought to include, at the very least, a vegetable peeler, hand-operated can opener, and a pair of tongs. Tool sets are a great way to ensure you have all the necessary pieces to make your prepwork easier.
Mixing Bowls
You'd be surprised by how much mixing you might do—from pancake batter to vinaigrette—so look for durable bowls that can handle large and small volumes. A bonus: They double as serveware. And because these often come as nesting bowls, they won't take up much space. If possible, find ones with lids, which make them perfect for keeping leftovers. Multitasking, after all, is crucial when space and budget are limited.
Measuring Cups
It's tempting to measure liquid and dry ingredients with the same implements, but in fact, measuring cups for each are designed slightly differently to accommodate the innate qualities of wet and dry ingredients. Wet measures have a spout for easy pouring; if made of tempered glass, the vessel can hold hot liquids and be used in the microwave. A measuring cup with both metric and standard units is ideal.
Dry Measuring Cup
Designed to be filled to the top and leveled off, dry-ingredient measuring cups are handy not only when you bake but also when making oatmeal or cooking up rice or quinoa. Look for stainless steel, a material that's stain- and odor-resistant.
Measuring Spoons
Measuring spoons have their place in every kitchen. Look for a set that allows you to separate the spoons from the ring and that includes the handy half-tablespoon measurement.
Colander
Pasta is any young adult's dinner staple, given that it's cheap, quick, and easy. But to drain the noodles, you'll want a colander. Although colanders are available in both plastic and metal, we prefer the more durable metal ones. Other uses for a colander: draining cooked vegetables, rinsing salad greens, and making spaetzle. Look for ample perforation for maximum drainage.
Spatula
A spatula is indispensable. How else could you scramble eggs, flip a burger, or successfully remove cookies from a baking sheet without crumbly disappointment? A slotted spatula allows you to leave excess liquid or oil behind.
COOKWARE
Nonstick Saucepan
A nonstick saucepan makes cleanup a breeze. As with any cookware, a comfortable handle is easier to grip and safer to use. A 2-quart pot is perfectly sized for cooking for one (and perhaps two)—whether it's pasta, soup, vegetables, or rice.
Nonstick Frying Pan
You could argue that frying pans are a kitchen's workhorse: You can brown, fry, and sauté with one. Omelets, stir-fries, hamburgers, pancakes, and grilled cheese sandwiches are just some of the foods that can be cooked in a frying pan. The easiest to clean are those with nonstick surfaces, which can be pretty forgiving (especially helpful if you're a beginner cook). Try to get one with a lid so you can braise in it as well as keep food from spattering.
BAKEWARE
Rimmed Baking Sheet
Rimmed baking sheets work not only for baking cookies and doughnuts but for savory dishes as well—roasted vegetables, dinner rolls, spatchcocked chicken, a whole fish, or even a rack of lamb. They're also useful in catching a pie's overflow juices. An accompanying storage lid can help keep cooled baked goods fresh, as well as make transporting them a neater endeavor.
Baking Dishes
Baking dishes make pies and crisps, roast chickens, and all sorts of casseroles—hello, mac 'n' cheese—all possible. They're even useful for serving straight from the oven to the table. Although you can find baking dishes made of ceramic, stoneware, and metal, our preference is for glass, which tends to be relatively inexpensive and allows for easy monitoring of the cooking process. Baking dishes with lids are great for storing leftovers or transporting your masterpiece to a potluck party.
LINENS
Kitchen Towels
If there's a trick to cooking completely mess-free, we haven't mastered it yet, so thank goodness for kitchen towels! Besides wiping stuff up, towels are great for drying delicate salad greens, covering rising bread, or keeping food wrapped and warm on the table. Plus, towels are an easy and relatively inexpensive way to display your kitchen personality.
Pot Holders and Oven Mitts
They say the mark of a true chef are burns on one's hands and arms, but we're all about safety. Not only will good-quality pot holders and mitts protect your digits and limbs, but they're also impromptu trivets, shielding your counters and tabletop. Silicone pot holders offer high-heat protection, but you might find that heat-proof quilted pot holders are a little more flexible and easier to use.
TABLETOP
Dishware
Now that you can make whatever delicious delicacy you please, you'll need something stylish to serve it on. No eating out of the pot! Though the lowest-priced tableware may not last, durable, good-looking dishware is possible to find without breaking the bank. Buying individual pieces has its advantages, but if you prefer a dinnerware set, look for one that includes at least a dinner plate, salad plate, bowl, and mug.
Flatware
It's time to graduate from disposable utensils, if you haven't already. Buying individual pieces to accommodate your lifestyle can be a little tricky, though, since many sets offer more than what you may really need. One piece of advice: Food tastes better when enjoyed with a friend or loved one, so buy enough for at least two of you.
Drinking Glasses
Drinking straight from a carton or bottle isn't very grown-up, so be sure to get some basic glassware. A combination of taller drinking glasses and shorter tumblers allows you to offer guests a variety of drinks.
That's just about it! Bring out your checklist and make sure that you get everything ready for your new home!
Do you happen to have any suggestions for our new graduate friends? Let your thoughts be heard in the comment section below and don't forget to share this post with family and friends on Facebook and Twitter. Thanks!
-XoXo
post credit: http://bit.ly/1vqqHhP
27.11.14
Finding the Right Red Lipstick for All Skin Types
 |
| valentinadangela.wordpress.com |
The holiday period is fast-approaching and you know what that means... parties, parties and more parties! It's the time of year everyone always asks me what beauty must-have they need in their makeup bag. My answer? Red lipstick. Just like the little black dress is a wardrobe classic, a swipe of red lipstick is all you need to always look chic and glamorous. However, no one shade of red lipstick will suit every woman, which is why We've created a how-to guide to finding the right red for your skin tone this holiday season.
FAIR SKIN
Red lippies with an orange hue work best on fair complexions. The hint of orange brightens up your entire look without washing you out. If you want to make things flirty and playful, finish with a gloss. The shine and additional sparkle is perfect for parties.
MEDIUM SKIN
Women with sun-kissed or olive skin tones should reach for a fiery shade -- instead of a reddish brown or a berry -- to suit their warmer complexions. Make a statement! Try a shade with an on-trend, matte finish for a real punch of color.
DEEP SKIN
Opt for reds with burgundy and maroon undertones. Dark reds make for a romantic finish to your holiday look! Step it up a notch by lining your lips last with a plummy brown lip liner. Blend well to create an ombre effect to your pout. Important note! When you're trying out a brand new lippie, you need to give yourself time to adjust to the color. Sit with it on for a few minutes before making a final decision. You might have reservations at first, but after a few minutes, you may just have found your new fave color!
- Once you've found your perfect shade of red, it's time to ensure your lippie lasts through the hors d'oeuvres and cocktails.
- Make sure your lips are properly hydrated by applying a lip balm to them the night before. This helps your lip color last and blends seamlessly.
- Next, apply your red lip and follow with a lip liner. Lining lips last helps keep the color from feathering and defines their natural shape.
- And finally, when you're just about to head out the door, swipe a cotton tip through the center of your mouth.
This will keep any lipstick from transferring onto your teeth.
-XoXo
post credit: http://huff.to/1xZBdxg
26.11.14
Get More Battery Life on the Go
 |
| photo credit: faveable.com |
Nothing makes a heart skip a beat like a red-flat battery icon: "How will I finish off that text, email, presentation, photo or ebook?" The tricks below will let you power your devices and gadgets while travelling without adding much bulk to your baggage – but the best way to avoid a battery emergency may also be to practice power-saving habits.
Charge on the go
Portable battery chargers are little boxes, smaller than a deck of cards, that can give you hours of extra phone, iPad, Kindle, camera or gaming juice while on the go; some are even solar powered. Pop one of these in your bag or pocket on a night out in your own town as a handy backup. For iPhone users, slim phone cases are available that hold hidden battery packs to double your usage time, so you don't even have to think about recharging.
Keep a wall charger in your bag to refuel your device at common chains such as Starbucks, which often offer power points and free wi-fi.
A lighter choice
Most Kindles and other ebook readers have a battery life of a month – much more convenient than the iPad's daily charging demands. So if you just only care about reading books (and not watching videos or surfing the net), ask yourself if you really need that iPad or if a cheaper, lighter and more efficient ebook reader will be a better fit.
Now may also be the time to dust off an old backup phone. Remember when phones without touchscreens lasted for days without having to recharge? If you have one lying around, take it with you on holiday so you can stay in touch without battery stress.
Perhaps the most battery-efficient device may be the one that boots instantly and has a paper-thin display: the printed book. Using a travel guidebook, map or notebook (the pen and paper kind) can be more stress-free than relying on an internet connection, Google Maps or a keyboard.
How to save your phone or gaming device's battery
Most modern phones and gaming devices such as the Sony Playstation Vita devour their battery life on the two things that make them wonderful – the monitor-like displays and the internet connection. We wouldn’t expect any phone junkie to cut these features out completely, but dialling it back can help you get through a whole day without a battery icon freak-out. Some other good tips for lightening the load on your battery:
- Turning the screen to its dimmest setting saves a lot of energy, as does not using your phone to read the time – use a watch, not the battery-hungry phone display.
- Turn off GPS and wi-fi when you’re not using either of these draining features. Data use is even more power-hungry, so in the phone’s settings, select the option not to sync automatically in the background – that way you'll only use power to check for emails or run internet apps when you manually choose to do so. If you turn off data use altogether (crazy, we know) you’ll notice that your battery life will double. An app like Advanced Task Killer (Android; play.google.com) can turn off sneaky background apps to prevent them from sapping your power.
- Turn off 3G in areas where you can’t get a signal (like underground), otherwise the phone will constantly seek a signal, which will exhaust your battery.
- Phone calls use more power than texts, so communicate by SMS if possible.
How to save your camera's battery
Any task that involves the LCD screen will chew through your battery, so don’t spend too long looking through the photos you've taken if you can wait until you get home.
Similarly, if your camera has an optical viewfinder, use this and turn off the LCD screen – or at least turn down its brightness, since a dimmer screen uses less power. Turn on the camera screen’s sleep settings so that the display dims quickly after inactivity.
Use a memory card reader to download photos to your computer, making your computer do all the work, rather than burdening your camera’s battery.
How to save your notebook or iPad's power
Just as a hot day will make any traveller drag their feet slowly through the heat, the cold helps electronic devices run more efficiently, preventing battery-hungry features (such as fans in laptops) from kicking in. So try to keep laptops cool with airflow beneath them, and keep phones out of the sun. Also, don’t make your device work harder than it needs to: go easy on watching video and turn off background applications that aren’t essential – you'll often find items that you don’t even realise are running, such as Desktop Search, iTunes or Skype.
On an iPad, also turn off sync, push notifications, location services and data if you don’t need them.
Pack a spare
With the exception of iPhones, iPods and iPads, most cameras, laptops and phones allow you to swap the battery yourself in seconds, so buy a spare battery of the same make and keep it charged up and ready to go.
-XoXo
post credit: http://bit.ly/1xFCsy0
24.11.14
The Difference Between Silicone Baking Cups and Non-Silicone Baking Cups
 |
| photo credit: brownsugarbritches.com |
If you are someone that loves to bake, especially cookies, muffins and cupcakes then more than likely you spend hundreds of dollars yearly on paper baking cups since normal baking cups are not reusable. If you are having problems with your muffins sticking to your traditional baking cups or having your muffins crumble and cause a mess then it is high time to try out silicone baking cups. Silicone is FDA approved and very safe, is nonstick and stain resistant and research has shown that there are no toxic elements in silicone. Why switch to silicone you might ask? Here are the differences between silicone baking cups and non-silicone baking cups.
SILICONE BAKING CUPS
Non messy – Silicone baking molds do not tear and make muffins and cupcake that are easy to release. They can stand on their own so there is no need for a muffin tin, all you need is a sheet pan. You do not need to oil or grease any muffin tins or pans.
This being the case silicone baking cups are the ideal for children to use when baking as their cupcakes and muffins will be easier to come out so less mess for parents to clean up.
Reusable- You do not have to throw out your silicone baking cups after the first use as they are reusable, an attribute which also makes them cost effective as you do not have to buy a new batch of baking cups each time you feel like baking some delicious muffins or cupcakes.
For chefs who have to spend so much money on non-reusable baking cups silicone baking cups would be the ideal as they will be able to reuse them and even use them for other things other than baking muffins and cupcakes.
Safe and durable- Silicone baking cups are BPA free and FDA approved making them safe for family members and every one on a whole. Most plastic products contain BPA which can be unsafe.
Colorful – They come in many colors which brighten your kitchen and makes them fun to use. It is also noted that bright colors lighten one’s mood so these colorful silicone baking cups will surely have you in a good mood. Your kids and family members will also have fun choosing which color muffin they will like for that day.
Versatile - Silicone baking cups can be used for a number of things other than baking cupcakes and muffins and having kitchen gadgets, utensils or tools that are resourceful is a big plus for anyone. They can be used to make jello, serve nuts, and make cheese cake. And since they are also microwave and freezer safe they can be to reheat food items and to even make frozen treats.
Eco friendly - Galley Essentials Silicone baking cups are good for the earth as they can be recycled when you are ready to finally throw them out and more importantly they can be reused thousands of times.
Dish washer safe - Silicone baking cups can not only be washed with the hands using warm soapy water but are also top rack dishwasher safe and easy to clean.
NON-SILICONE BAKING CUPS
With paper or foil baking cups you still have to grease the pan or you will end up having muffins or cupcakes that will be fused to the paper making your cupcakes or muffins difficult to enjoy. Paper baking cups cannot stand on their own and if you are thinking about freezing them then they will get soggy once thawed. Most of them are plain or just simply holiday themed, never colorful. There is also the problem of getting your cupcake or muffin out of the paper baking cups, since it sticks most times, your cupcake or muffin ends up crumbling and making a huge mess.
Go ahead, weigh the pros and cons and decide whether it is time to make the switch and follow the trend to silicone baking cups. If you do, will not be a decision that you will regret.
-XoXo
photo credit: sprinklecharms.com
21.11.14
Homemade Refrigerator Deodorizing Disks
It is always nice to know how to save money and ultimately to live knowing that you can budget your finances well. With that being said, when it comes to cleaning agents most American households have been spending way too much on cleaners that does not only pose a threat to human health but also cause to adverse effects to family savings.
 |
| photo credit: newleafwellness.biz |
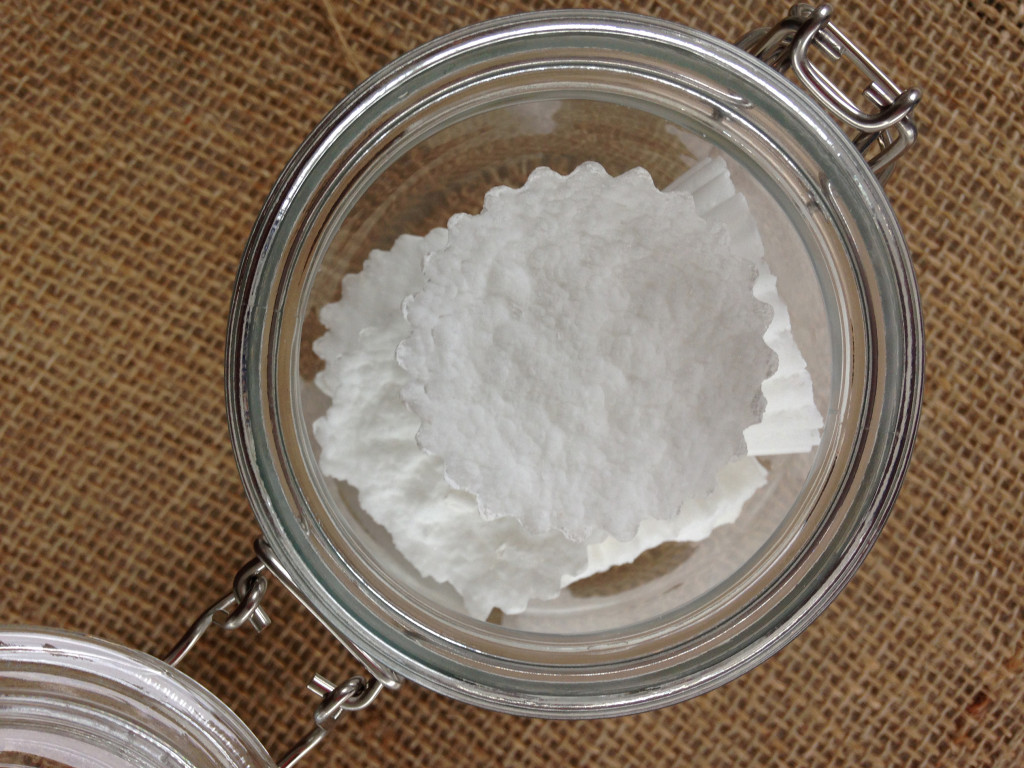
One great example of these cleaning agents are refrigerator deodorizers. Some may see it as an excess luxury item for their fridge and some may even see it essential for a spotless finish. Whichever may, spending $20 for a refrigerator deodorizer will always be beyond the practical majority most especially if these things can be made at home and can cost everybody less than a fraction of what they can see in grocery stores.
Here are some easy steps for you to save money and have a cheap and fresh-smelling refrigerator all year round!
Ingredients:
- 2.5 Cups of Baking Soda
- ½ – 1 Cup Water
- 15 Drops Essential Oil of Choice
Note: If you are worried about using essential oils, do not worry because we are not playing with fire here. The use of scented essential oils is for us to achieve a stronger and much more concentrated product that could last for longer periods of time.
Materials Needed:
- Measuring Cup
- Mixing Bowl
- Spatula
- Silicone Cupcake Liners
Directions:
1. Combine all ingredients together in the order of: baking soda, oil, then water.
2. Give the mixture a little stir until it reaches a damp consistency. If you are not sure what this means, try to imagine digging your toes into the beach's sand early in the morning or making a sand castle; damp but not overly wet.
3. If in the middle of stirring, you find that your mixture is not damp enough, you can add little drops of water at a time until you get the consistency you want.
2. Once you've completed mixing everything, scoop your mixture and add it to silicone molds or silicone cupcake liners and press the mixture firmly down for it to clump and harden later on. Don't worry about pressing too hard on these silicone liners, you won't be contaminating it because the ingredients used here are all natural. This will not affect any cupcake or muffin in the future.
3. Allow the mixture to dry for 2-3 days before taking them out of the silicone mold and putting it in a container for cleaning, display or whatever you have in mind.
How to Use this Deodorizer:
Put one of your finished products in a dish and inside your fridge for as long as 30 days. The time to switch deodorizers would depend on the longevity of the scent it produces.
Note: You can use this as your very own kitchen hack or you can even send this as a gift to your friend with kitchen-related woes. Not only that you can also use this deodorizer for your musty closet or inside your bathroom. The choice is yours!
-XoXo
post credit: missinformationblog.com
19.11.14
The Types of Makeup Foundation
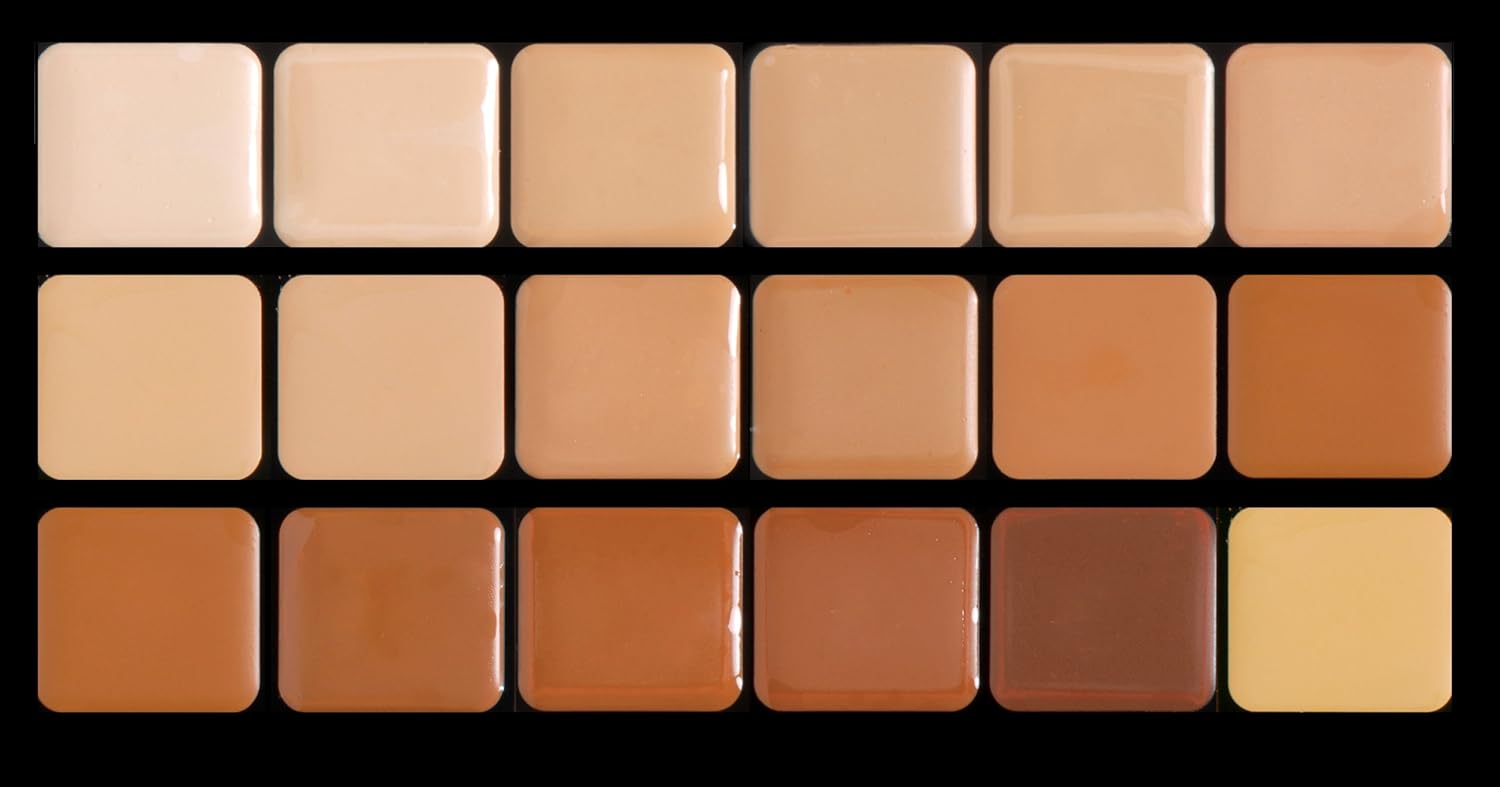
The very best way to achieve a smooth and even complexion is to apply foundation before you do your eye makeup, cheeks or lips. The right shade will disappear into your face making it appear as if you are wearing no makeup at all. A foam sponge like this one is the best way to apply foundation, but you can use your fingers or a foundation brush.
Finding the right foundation can be daunting because there are so many brands and formulations on the market.
Liquid (or Cream) Foundation
Liquid foundation is a basic term for foundations that come in liquid form. There are many specialized versions, including oil-free, oil-based, waterproof and even 24-hour. They can go from medium to full coverage depending on how much you apply.
To build foundation, simply apply a layer and let it dry, then apply another layer on top of it over your problem area.
Cream foundations provide a bit heavier coverage and are formulated for normal to dry skin.
Tinted Moisturizer
Tinted moisturizer provides light coverage and will cover up some unevenness, but is best for women with pretty good skin. It's truly a moisturizer with a wash of sheer color. It works as a 2-in-1 (sometimes 3-in-1 if it contains SPF) makeup product because it moisturizes while providing an all-over sheer color.
Tinted moisturizer is a great bet in warmer months when little coverage and some moisture is required. Keep in mind tinted moisturizers with SPF don't provide enough sun protection, be sure to supplement with sunscreen of at least SPF 40 to be safe.
Oil-based Foundation Makeup
Oil-based foundations add moisture and tend to temporarily "plump up" skin, making them a great foundation choice for anyone with dry skin and for older women who want to minimize the appearance of fine lines and wrinkles.
You'll want to shake up the bottle before use because the oil will separate in the bottle.
Sheer Foundation
If you are seeking a foundation that glides on smoothly, giving skin the appearance of having no foundation on at all, sheer foundation is a great bet. The coverage is light, so it won't give you the "cake face" if you apply too liberally. It tends to be buildable if you do want more coverage.
Sheer foundation is made with silicones and works best on women with normal to dry skin. Many sheer foundations today contain SPF, which gives you the added benefit of sun protection, but its always recommend supplementing with a sunscreen of at least SPF 40.
Matte, or "Oil-free," Foundation
Created for women with oily skin, matte (also marketed as "oil-free") foundations are formulated with water and not oil. They tend to dry quickly, so you will want to blend it in with a sponge or your fingers as soon as you apply. And always use moisturizer or foundation primer first to add an extra layer of moisturizer.
Mousse or Whipped Foundation
Mousse -- also marketed as "whipped foundation" -- is liquid makeup with air whipped in. This makes the product light and smooth. Mousse foundations tend to have a perfect matte finish and a weightless feel.
Whipped foundation is typically good for all skin types, but it's great for those with dry or mature skin because of its tendency to go on smoothly instead of caking up.
Stick Foundation
Stick foundations are portable so you never have to worry about spills in your purse or bag. The coverage tends to be heavier, making them perfect for covering up blemishes, scars, reddened areas and dark under-eye circles.
Stick foundations are best for normal to oily skin. If you have dry skin, make sure to apply a bit of moisturizer first because stick foundations can cake up on you. This is why its recommended using stick foundations only on your problem areas, leaving the rest of your face to regular liquid or cream foundation.
Powder (or Compact) Foundation
Powder foundation comes in compact form, so it makes a great foundation for women who want on-the-go portability. It's basically a powder and foundation in one and you can get it in several formulations, but it's really best for women with oily skin.
Mineral Foundation
For women interested in natural, organic makeup, mineral foundation is your absolute best bet. Mineral makeup is made up almost always primarily of minerals, which come from nature. It's a great bet for women with sensitive skin or allergies.
Mineral foundation is best applied with a big, fluffy brush.
Shimmer Foundation
Shimmer foundations contain ingredients that add a dewiness to skin. Buy in a shade lighter than your skin tone and apply only to those areas where you want to achieve brightness: above your brows, on the cheeks and the tip of the nose. Buy it online.
Waterproof Foundation
Waterproof foundation is made to stay on for a long time, which makes it perfect for humid areas and hot days. It also means you may not be able to remove it with just cleanser and water, you may need to use makeup remover. These foundations can clog up pores and you may be more susceptible to blackheads, so don't use this foundation daily.
Foundation Primer
Foundation primer works much in the same way as paint primer does -- it fills in the little cracks and pores in your skin allowing foundation to to to go on smoothly and seamlessly. Creating a barrier between your foundation and your skin may seem like an unnecessary step, but primers work so well, sales have been going up and up in the past several years. You can get a similar effect with a coat of moisturizer before applying foundation, but primer aficionados like myself know it's not exactly the same.
-XoXo
post credit: beauty.about.com
18.11.14
How to Clean Your Smartphone's Dirty Headphone Jack
 |
| post credit:somegadgetguy.com |
Almost everybody uses a smartphone. Most people take great care of their phones. They keep them safe using protective covers which are shock absorbent. They stick transparent covers on the screen of their phone to prevent scratches. However, most people neglect to take care of a pretty important thing on their phones. Wondering what it is? Well, you use it just about every day so guessing should be easy, no? Alright, it’s your phone’s headphone jack/port. Can you remember the last time you cleaned it? Have you ever cleaned it before?
Well, if you haven’t cleaned your earphone port because you simply gave up thinking about how you can actually clean such a tiny port, then you don’t need to worry as mentioned here are some of the easiest and simplest methods you can follow to clean your phone’s port:
Compressed Air
Alright, so this one of the easiest ways you can clean your phone’s headphone port is using a pressurized can of air. You can easily find one at your local Best Buy. Compressed air cans have tiny and thin tubes attached to their mouth which, when released, blow pressurized air straight into the headphone port, clearing away any dust or lint.
Cotton Swab
Using a cotton swab is another way of effectively cleaning your headphone port. All you need to do is remove bit of cotton from the stick until it can fit inside the port. Then, spray a bit of alcohol on the swab and start cleaning the port. This way you can ensure a deep clean of the port. Most people attempt to repeatedly insert their headphones pins to remove dust or dirt but that doesn’t do anything at all and can actually damage the port.
Paper Clips
If you don’t have swabs, the next best alternative is to use a paper clip as it is both thin and does not have a sharp end. You can easily use the tip of the pin to scrape out bits and pieces of stubborn lint and dust particles which a cotton swab normally won’t take out. You can even place some sticky tape at the end of the tip so that the dust sticks to the pin.
Needle
Your headphone jack along with your charging dock can both get gunk or lint or other dust particles which can seriously affect the performance of both docks. In various instances, smartphones don’t switch from headphone to speaker, without having the headphone in. Instead of taking your phone to a technician to get it cleaned up, you can use an average sewing needle and with gentle hands insert it in the dock and sort of weave it around gently so that the gunk comes out. Keep at it for a few minutes and you’ll see how much dust and lint comes out.
Although the above tips are useful for cleaning the headphone port of your smartphone, wouldn't it be easier you don’t have to do anything at all? You can easily get good port plugs for your headphone jack in order to prevent your phone’s jack from getting dirty at all. They are easy to use, reasonably priced and above all, you don’t have to worry about not being able to take your phone anywhere, even the beach.
We hope you find these tips useful in your headphone jack cleaning escapades!
-XoXo
post credit: portplugs.com
Freeze and Store Old Fashioned Rolled Oats in Silicone Baking Cups
 |
| photo credit: mangiablog.com |
Old fashioned oats taste much better than instant varieties, are cheaper and better for you. The downside is that they take a while to cook, usually 10-20 minutes or a little longer if you use steel-cut oats. Why not make a large batch when you have the time and then freeze individual portions in silicone muffin tins and/or baking cups?
 |
| photo credit: fancythatfancythis.com |
Crafting weblog Make Something… recommends preparing a batch of oats for freezing using just rolled or steel-cut oats, water and salt. Three cups of oats, five and a half cups of water, and one teaspoon of salt will make enough for twelve small servings. When the oatmeal has finished cooking you can transfer it to the silicone cups or muffin tin and place in the freezer for a few hours until thoroughly frozen. Pop the frozen oats into a plastic freezer bag and they'll be ready to go for a month or longer.
 |
| photo credit: tenatthetable.com |
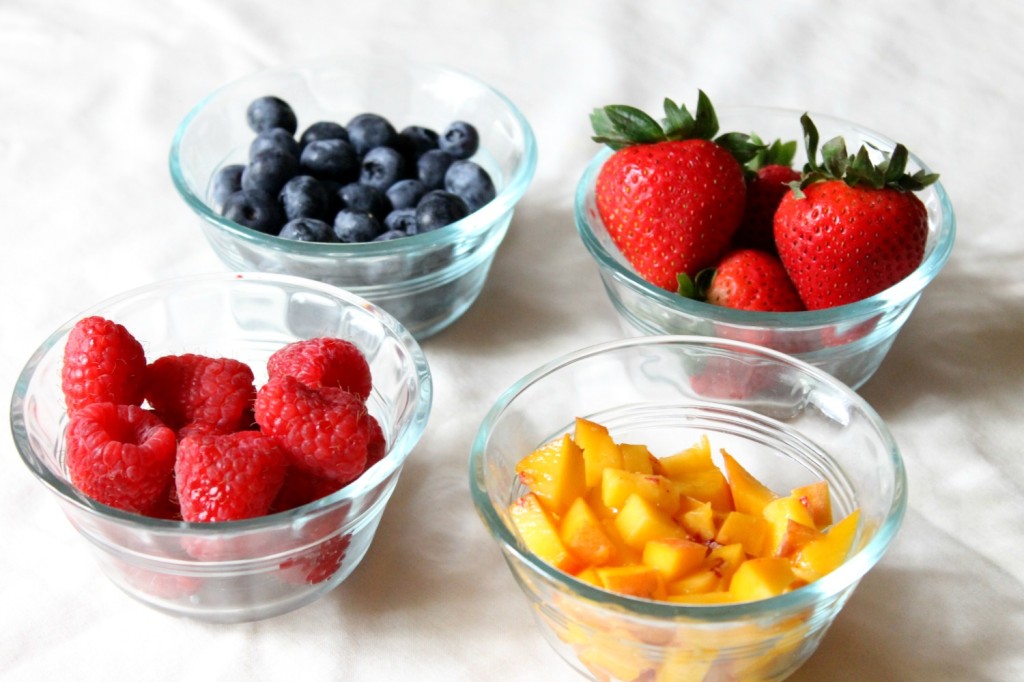
You can also add in most oatmeal toppings before freezing such as brown sugar, raisins, nuts and other dried fruits and spices, but save fresh fruit and milk until you've reheated the oats. To do so, place the frozen oats in a microwave safe bowl and nuke for two minutes on high. Stir it, and then microwave for another 30 seconds, and add any last minute toppings such as banana slices or milk.
Note: Freezing your rolled oats will allow you to spend lesser time in preparing a quick grab on the go.
Were you also able to do something similar to this? Do you have some tips and tricks up your sleeve? Let us know in the comment section below and don't forget to share this tip with your family and friends on Facebook and Twitter. Thanks!
-XoXo
post credit: lifehacker.com
Subscribe to:
Posts (Atom)