Showing posts with label Food Tech. Show all posts

28.11.14

Kitchen Essentials for the New Graduate

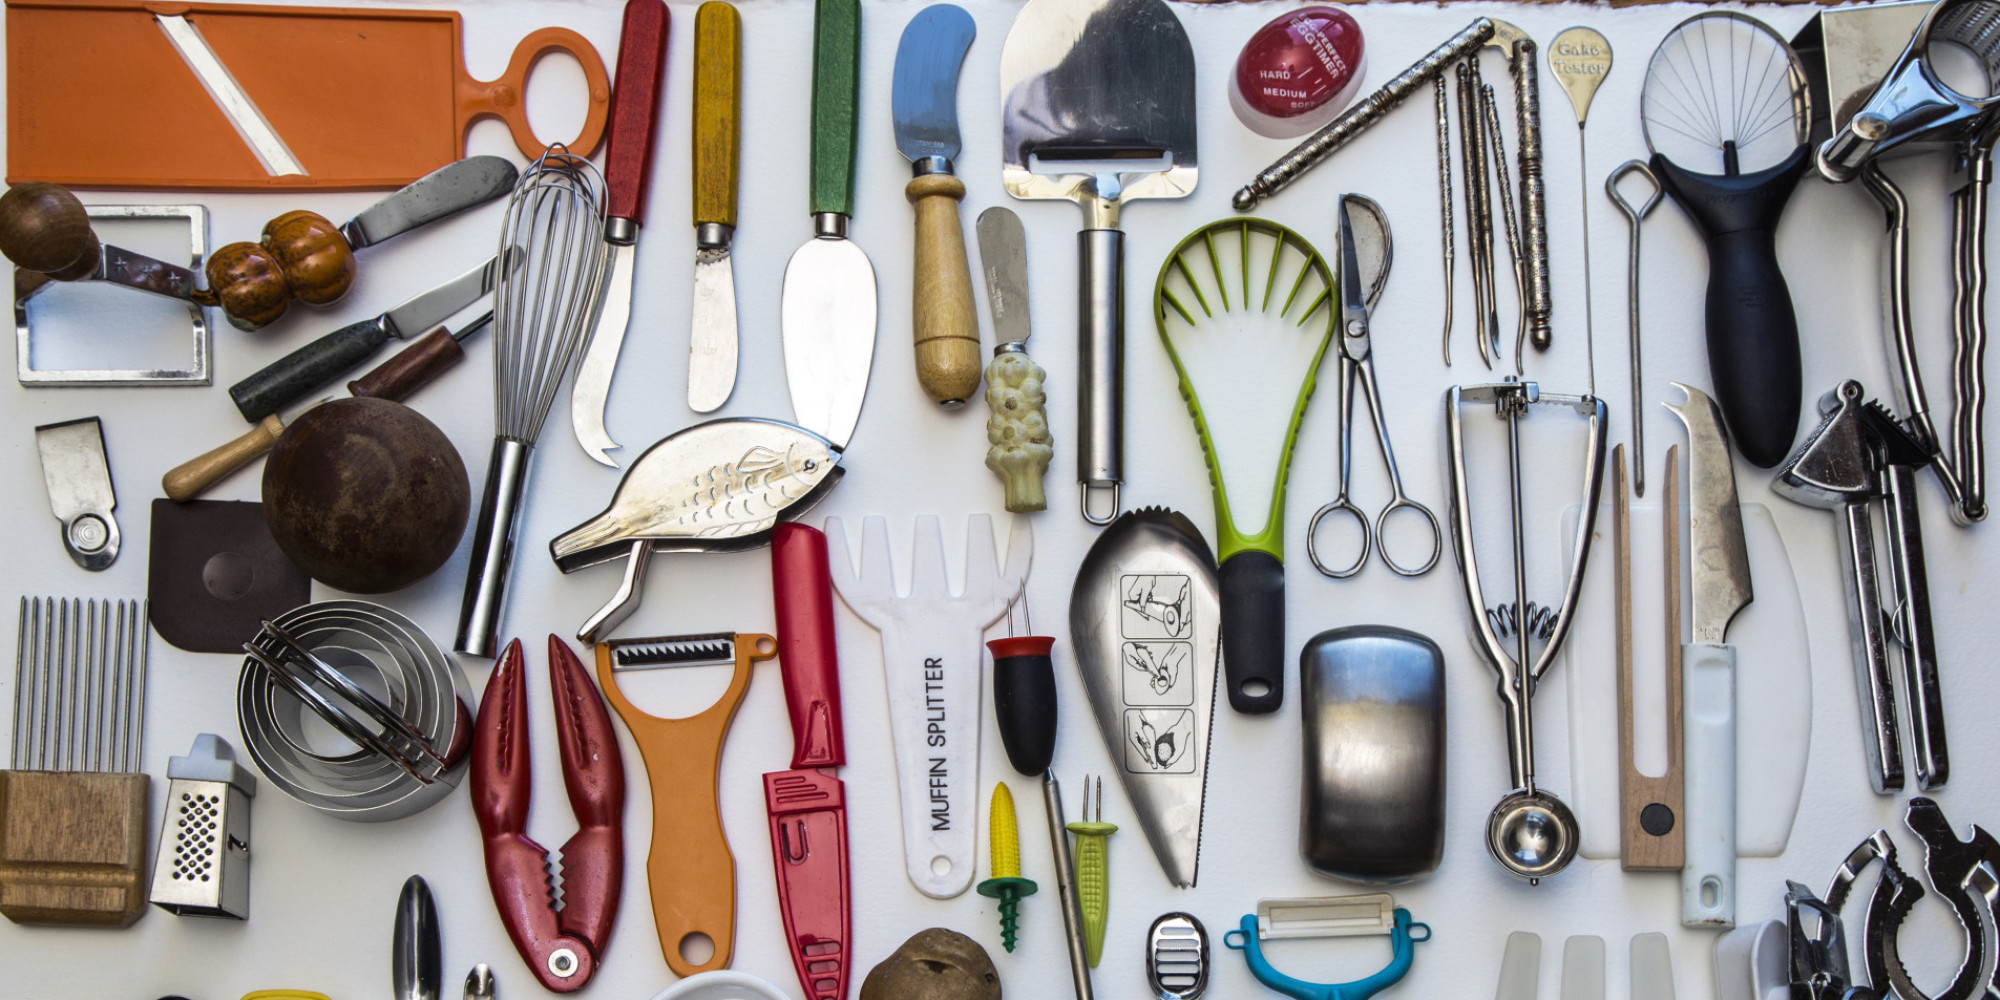
photo credit: huffingtonpost.com

If you or someone near and dear to you is heading off for the first year of college, moving off-campus, or venturing out into the world as a college grad, some basic kitchen gear—tools, pots, pans, plates, and more—makes an excellent and practical graduation gift. At this stage in life, bang for the buck is of utmost importance, and given that kitchen space can be at a premium (especially when shared with roommates), we did our best to track down the most affordable, durable, and well-designed kitchen essentials we could find. Read on for 21 kitchen basics to help you or your grad whip up some scrambled eggs, bake your favorite chocolate chip cookies, and throw a dinner party for friends.


PREPWARE


Knives 
Ah, the transformative power of sharpened steel. Whether you're dealing with fruit, vegetables, herbs, or meat, you're going to need to chop, slice, or dice something at some point. The two most important knives in your arsenal are a good-quality chef's knife to tackle the big stuff and a paring knife that can handle the little things. A good knife should feel comfortable and well balanced in your hand.

Cutting Board 
A wooden cutting board will be easy on your blades, keeping your knives in tip-top condition. Dedicated cutting boards—one each for meat, seafood, poultry, and produce—are ideal, but not necessarily practical when space and funds are tight. Just be sure to sanitize your board after working with raw meats or seafood, to avoid cross-contamination.

Tools 
A well-stocked kitchen ought to include, at the very least, a vegetable peeler, hand-operated can opener, and a pair of tongs. Tool sets are a great way to ensure you have all the necessary pieces to make your prepwork easier.

Mixing Bowls
You'd be surprised by how much mixing you might do—from pancake batter to vinaigrette—so look for durable bowls that can handle large and small volumes. A bonus: They double as serveware. And because these often come as nesting bowls, they won't take up much space. If possible, find ones with lids, which make them perfect for keeping leftovers. Multitasking, after all, is crucial when space and budget are limited.

Measuring Cups
It's tempting to measure liquid and dry ingredients with the same implements, but in fact, measuring cups for each are designed slightly differently to accommodate the innate qualities of wet and dry ingredients. Wet measures have a spout for easy pouring; if made of tempered glass, the vessel can hold hot liquids and be used in the microwave. A measuring cup with both metric and standard units is ideal.

Dry Measuring Cup 
Designed to be filled to the top and leveled off, dry-ingredient measuring cups are handy not only when you bake but also when making oatmeal or cooking up rice or quinoa. Look for stainless steel, a material that's stain- and odor-resistant.

Measuring Spoons
Measuring spoons have their place in every kitchen. Look for a set that allows you to separate the spoons from the ring and that includes the handy half-tablespoon measurement.

Colander
Pasta is any young adult's dinner staple, given that it's cheap, quick, and easy. But to drain the noodles, you'll want a colander. Although colanders are available in both plastic and metal, we prefer the more durable metal ones. Other uses for a colander: draining cooked vegetables, rinsing salad greens, and making spaetzle. Look for ample perforation for maximum drainage.

Spatula
A spatula is indispensable. How else could you scramble eggs, flip a burger, or successfully remove cookies from a baking sheet without crumbly disappointment? A slotted spatula allows you to leave excess liquid or oil behind.


COOKWARE


Nonstick Saucepan 
A nonstick saucepan makes cleanup a breeze. As with any cookware, a comfortable handle is easier to grip and safer to use. A 2-quart pot is perfectly sized for cooking for one (and perhaps two)—whether it's pasta, soup, vegetables, or rice.

Nonstick Frying Pan 
You could argue that frying pans are a kitchen's workhorse: You can brown, fry, and sauté with one. Omelets, stir-fries, hamburgers, pancakes, and grilled cheese sandwiches are just some of the foods that can be cooked in a frying pan. The easiest to clean are those with nonstick surfaces, which can be pretty forgiving (especially helpful if you're a beginner cook). Try to get one with a lid so you can braise in it as well as keep food from spattering.


BAKEWARE


Rimmed Baking Sheet 
Rimmed baking sheets work not only for baking cookies and doughnuts but for savory dishes as well—roasted vegetables, dinner rolls, spatchcocked chicken, a whole fish, or even a rack of lamb. They're also useful in catching a pie's overflow juices. An accompanying storage lid can help keep cooled baked goods fresh, as well as make transporting them a neater endeavor.

Baking Dishes 
Baking dishes make pies and crisps, roast chickens, and all sorts of casseroles—hello, mac 'n' cheese—all possible. They're even useful for serving straight from the oven to the table. Although you can find baking dishes made of ceramic, stoneware, and metal, our preference is for glass, which tends to be relatively inexpensive and allows for easy monitoring of the cooking process. Baking dishes with lids are great for storing leftovers or transporting your masterpiece to a potluck party.


LINENS


Kitchen Towels 
If there's a trick to cooking completely mess-free, we haven't mastered it yet, so thank goodness for kitchen towels! Besides wiping stuff up, towels are great for drying delicate salad greens, covering rising bread, or keeping food wrapped and warm on the table. Plus, towels are an easy and relatively inexpensive way to display your kitchen personality.

Pot Holders and Oven Mitts 
They say the mark of a true chef are burns on one's hands and arms, but we're all about safety. Not only will good-quality pot holders and mitts protect your digits and limbs, but they're also impromptu trivets, shielding your counters and tabletop. Silicone pot holders offer high-heat protection, but you might find that heat-proof quilted pot holders are a little more flexible and easier to use.


TABLETOP


Dishware 
Now that you can make whatever delicious delicacy you please, you'll need something stylish to serve it on. No eating out of the pot! Though the lowest-priced tableware may not last, durable, good-looking dishware is possible to find without breaking the bank. Buying individual pieces has its advantages, but if you prefer a dinnerware set, look for one that includes at least a dinner plate, salad plate, bowl, and mug.

Flatware 
It's time to graduate from disposable utensils, if you haven't already. Buying individual pieces to accommodate your lifestyle can be a little tricky, though, since many sets offer more than what you may really need. One piece of advice: Food tastes better when enjoyed with a friend or loved one, so buy enough for at least two of you.

Drinking Glasses 
Drinking straight from a carton or bottle isn't very grown-up, so be sure to get some basic glassware. A combination of taller drinking glasses and shorter tumblers allows you to offer guests a variety of drinks.


That's just about it! Bring out your checklist and make sure that you get everything ready for your new home!

Do you happen to have any suggestions for our new graduate friends? Let your thoughts be heard in the comment section below and don't forget to share this post with family and friends on Facebook and Twitter. Thanks!


-XoXo 
post credit: http://bit.ly/1vqqHhP

18.11.14

Freeze and Store Old Fashioned Rolled Oats in Silicone Baking Cups

photo credit: mangiablog.com

Old fashioned oats taste much better than instant varieties, are cheaper and better for you. The downside is that they take a while to cook, usually 10-20 minutes or a little longer if you use steel-cut oats. Why not make a large batch when you have the time and then freeze individual portions in silicone muffin tins and/or baking cups?

photo credit: fancythatfancythis.com

Crafting weblog Make Something… recommends preparing a batch of oats for freezing using just rolled or steel-cut oats, water and salt. Three cups of oats, five and a half cups of water, and one teaspoon of salt will make enough for twelve small servings. When the oatmeal has finished cooking you can transfer it to the silicone cups or muffin tin and place in the freezer for a few hours until thoroughly frozen. Pop the frozen oats into a plastic freezer bag and they'll be ready to go for a month or longer.

photo credit: tenatthetable.com
You can also add in most oatmeal toppings before freezing such as brown sugar, raisins, nuts and other dried fruits and spices, but save fresh fruit and milk until you've reheated the oats. To do so, place the frozen oats in a microwave safe bowl and nuke for two minutes on high. Stir it, and then microwave for another 30 seconds, and add any last minute toppings such as banana slices or milk.

Note: Freezing your rolled oats will allow you to spend lesser time in preparing a quick grab on the go.


Were you also able to do something similar to this? Do you have some tips and tricks up your sleeve? Let us know in the comment section below and don't forget to share this tip with your family and friends on Facebook and Twitter. Thanks!


-XoXo
post credit: lifehacker.com

16.11.14

Low Sugar Whole Wheat and Oatmeal Blueberry Muffins with Lemon


As contradictory as it sounds, people have a much easier time eating a good breakfast every day when rushing off to work in the morning. On those days, grabbing some Peanut Butter Oatmeal or Cottage Cheese and Egg Breakfast Muffins and throwing them in the microwave was just part of the routine of getting ready for work. This is great if you are faced with a fixed working schedule but when it shifts you must consider still wanting to keep the breakfast habit and grabbing a hold on healthier quick-grab options.

These are called low-sugar muffins, because we already have natural sugars oozing from blueberries. You only need to add 1/3 cup of granulated sugar for 12 muffins to achieve a low fat quick-grab breakfast diet.

Low Sugar Whole Wheat and Oatmeal Blueberry Muffins with Lemon

(Makes 9-12 muffins, depending on size of muffin cups or pan used.)

Ingredients:

1 1/4 cup rolled oats (regular or extra thick oats, but not instant)
1 cup white whole wheat flour
1 T baking powder
1/2 tsp. salt
1/3 cup Granulated sugar
1 1/2 tsp. dried lemon zest or use 1 T fresh lemon zest
1 egg
1 cup milk
1/4 cup vegetable oil
1 cup fresh blueberries (If frozen, be sure to thaw first)


Instructions:


Mix together the oats, flour, baking powder, salt, sweetener of your choice, and dried lemon zest, stirring until ingredients are well combined. (If you're using fresh lemon zest, add it to the wet ingredients.)

In a separate bowl, beat the egg with a fork, then mix in the milk and vegetable oil. (Add the fresh lemon zest to this if you're using it.)

Add the wet ingredients to the dry ingredients and stir just long enough to combine them. (Don't overstir!)

Then gently fold the blueberries into the muffin batter, again barely stirring until the mixture is combined.

Take out your individual silicone muffin cups and filled them about 3/4 full, which will make 12 small-ish muffins. This would probably make about 9 large muffins if you used the larger size muffin pan.

That's all folks! Set it aside for 30 minutes to cool and you can serve them with fresh juice or your favorite coffee blend. The choice is yours!


What are your thoughts with this healthy delectable and easy to make breakfast? Have you tried something similar to this? Let your thoughts be heard in the comment section below and don't forget to share this recipe with your family and friends on Facebook and Twitter. Thanks!


-XoXo
post & photo credit: kalynskitchen.com

10.11.14

The Many Uses of Coconut Oil in Our Daily Lives

fairwaymarket.com

It's has always been a housewife's dilemma to search for the perfect cooking oil to use at home, most especially one that is stable, healthy, has long shelf-life, does not easily go rancid and easy on the budget all at the same time. Most families in Asia, particularly in the Philippines and in Southern India, has already found the answer to this dilemma for more than a hundred years already. Since time immemorial, these places have been using coconut oil in many aspects of their daily living; reaping the many benefits it can provide. The use of coconut oil has no known adverse side-effects or negative impact on the health and finances of its users. We commonly believe that coconut oil can only be used for cooking, hair and skin care; that's actually not the case. You will be surprised to know that coconut oil has many uses and is not only limited to cooking and beauty regimens. Places near coastal and tropical regions grow coconuts in abundance and can surely teach us a thing or two when it comes to using coconut oils in innovative ways.

What Makes Coconut Oil So Special?

The use of coconut oil is backed up with many researches proving that not all saturated fats are not good for your health. It is common knowledge that saturated fats increase the level of cholesterol in the blood. Truth be told, not all cholesterol are 'bad' per se.

Here are many ways you can incorporate the use of coconut oil into your diet and daily lives:

1. Cooking With Coconut Oil

This is the most common way people know how to use coconut oil. You can use coconut oil as a replacement to many other expensive and cardiac-stressing cooking oils such as canola, corn and even all purpose vegetable oils. Expeller pressed or virgin coconut oil, you can use it generously! You can even use it for baking!


2. Coconut Oil in Hot Drinks, Soups, Yogurts, & Smoothies

Aside from cooking, you can use coconut oil and add it to your concoction of smoothies, yogurt, coffee, tea, and many other homemade broths. Just make sure that you gently melt your coconut oil first, slowly adding it to your cold delectable blends to avoid clumping.

3. Coconut Oil Candy

Oh yes, you heard that right! Coconut oil can also be made into candy! Not only will you have the upper hand to make your kids eat coconut oil, but you also get the opportunity to have a heart-healthy treat for your family to share.

4. Coconut Oil as Moisturizers

Make this and you never have to live with dry and cracked skin ever again! If you've been yearning to have skin so soft and supple like a baby's bottom then make this your daily regimen. Say goodbye to lotions and moisturizers with false advertising and harmful chemicals, au naturel is in!

5. Coconut Oil as Toothpaste

This may sound baffling but coconut oil has many antibacterial and antimicrobial elements to it, making it an instant candidate for an organic cleansing agent. Mix coconut oil with a little sea salt and baking soda until you come close to a consistency that of a toothpaste's. If it's too much for you, you can add coconut oil to your toothbrush after you brush your teeth with your preferred toothpaste.

6. Coconut Oil as Deodorant

Oh yes you can! Make your very own homemade deodorant with the use of coconut oil. Try this recipe here.

7. Coconut Oil as Your Daily Bath Oil & Salt Scrub

Young and healthy skin here we come! This is relatively easy to make, just one teaspoon of everything (1 part Coconut oil to 1 part salt). For better effects, use virgin coconut oil.

8. Coconut Oil as A Deep hair Moisturizing Treatment

Not only does coconut oil have antibacterial and antimicrobial properties but it is also known as the best natural hair volumizer and moisturizer to date. Moisturize your hair once or twice a week and you leave with a happy and healthy hair away from breakage and a scalp far from flaking.

9. Quench Your Thirst with Coconut Milk

You can enjoy a hot or cold glass of coconut milk and still get the same benefits of taking one tablespoon of pure coconut oil. You can still taste the slight hint of coconut oil in the milk though but the subtle taste of coconut milk and oil makes things taste better.


There you have it folks! These are just a few examples of how you can incorporate the use of coconut oil into your diet and daily lives. If you happen to have more uses for coconut oil, please feel free to share share them in the comment section below and don't forget to share this post with family and friends on Facebook and Twitter. Thanks!


-XoXo
post credits: kitchenbuddies.com

31.10.14

Your Kids Will Never Have a Boring Lunch Box Ever Again


It's quite challenging to feed our little members of the family, let alone cook food and present it in a way that would look appetizing enough for them to pick and eat. With that being said, If you happen to be a parent in a desperate search for new and exciting ways to prepare your kid's  lunchbox, you came to the right place! Here's a fresh take on how to revamp your kiddie meals, bento style!


THE THINGS YOU WILL NEED


  • Box: You don't need to have an expensive lunch box for this. If your kid's lunchbox is still as colorful and as it was the first time you bought it, you can reuse it! What's important is that you have a container for all those beautiful recipes you prepared for the day.
  • Silicone Baking Cups: These colorful cups are not only attractive to the eyes but they are also great for keeping wet, oily and dry things separated like green peas, biscuits and whatnot.
  • Knife: A sharp knife can do you wonders to your presentation. You can spruce up your ingredients into strips, squares, cube and whatnot.
  • Cookie Cutters: These baking accessories are not only good for creating the perfectly shaped desserts you can ever come up with, but it can also turn your food presentation to a whole new level. Heart shaped eggs? Sun shaped tarts? You got it!


WHAT TO CONSIDER WHEN MAKING A BENTO BOX


1. Food should look neat
To be able to achieve this, you have to make sure that the food you prepare are stacked properly. A neat presentation is a clean presentation.

2. Cut shapes
This is where your cookie cutter accessory comes in. Make fun shapes and add personality to you dish that your kids would love to munch on. Cheese made of hearts? Ham cut into strips? Vegetable hearts? The choice is yours!

3. Roll-ups
Roll-ups are signature pieces of a bento box meal. Make a simple concoction of your favorite deli meat strips, cheese, and spices rolled into one mouthwatering bite-size piece that is not only packed with flavor but is also aesthetically appealing.


PACK IT ALL IN!


This is the fun part! Here's where you would organize all your edible masterpieces and fit them into your bento box lined with your colorful silicone baking cups. Always put in mind that when making a bento box, make sure that you fill it completely so that food would not go run around and spill to all the compartments you made.

After packing everything in, don't forget to garnish your creation with small bite-size pieces like grapes, berries, cubes of cheese, cherries, tomatoes and all other colorful goodies to fill-in the little gaps of your meal box.

Once everything is in place, show your kid what he/she will be having for lunch and see your child’s face filled with excitement over the delectable masterpiece you have created.

Don’t have a child? No problem! You can make one for yourself or for your partner as a gesture of your appreciation for having him/her in your life!

What are you waiting for? Make one today!


-XoXo