Showing posts with label Art. Show all posts

23.1.15

Cleaning Your Paint Brushes After an Oil Painting Project

An artist’s most valuable tools are his or her brushes, and to keep a paintbrush lasting as long as possible it’s important to get all the paint out of the bristles after painting. (It also helps to buy good artist paintbrushes to begin with.)

photo credits: instructables.com


Here are some processes to consider when cleaning your very own paint brushes.

  1. First get some paint thinner, turpentine, or mineral spirits—ideally you should already have some on hand to mix with linseed stand oil for painter’s medium. Pour a little bit of the thinner into a small container which you can seal up afterward; you’ll be able to use the same amount of thinner for a long time.

  2. You’re also going to need some liquid soap— you can use regular hand soap for this but if you have a brush cleaning agent you can trust, you can use it as well; either way, these cleaning products work well. The only advantage of using a brush cleaner is that you get to have added bristle conditioners mixed in, so it may prolong the life of your brushes better than regular hand soap.

  3. Of course, you won’t need the brush cleaner or soap until you get all the excess paint out of your brushes. Here’s where a little finger strength comes in handy. Take your brush with one hand and a piece of newspaper with the other, wrapping the newspaper around the metal part of the brush.

  4. Then, just squeeze as tightly as possible, starting right at the base of the bristles, while pulling the brush back through your fingers. Get as much paint as you can out of the brush.

  5. Go ahead and do it a few times, and especially try to remove all the paint that’s stuck close to the ferrule (the metal part of the brush.)

  6. You should end up with splotches of paint all over your newspaper and a lot less of the paint left in your brush.

  7. Next, take your brush over to the small container of paint thinner and dip it in, scrubbing across the bottom of the container to loosen more paint.

  8. Repeat the squeezing technique with more newspaper, but be warned that it can get a little messier this time around since your brush will have picked up a lot of the liquid thinner. You should see a quite a bit more color flowing out of the bristles however.

  9. Once you’ve squeezed out the thinner a few times your paintbrush will probably have a little more of its original color back, but there’ll still be a paint stain left from the oils.

  10. To finish cleaning the brush, pump some liquid soap into the palm of one hand and hold the paintbrush with your other.

  11. Scrub the brush back and forth across your palm, letting the soap penetrate the bristles to pull out more oil pigment. When the soap gets too contaminated by the paint, rinse both your hand and the brush with water, then get more soap and begin scrubbing again.

  12. Repeat the process until the soap doesn’t change color in your palm, proving that there’s no more oil paint stuck in the brush. (NOTE: If you’re concerned about possible absorption of Cadmium into your skin during this stage, feel free to use disposable gloves.)

  13. Rinse out all the soap and use your newspaper one last time to get most of the water out of the bristles.

  14. It’s important to clean your brushes immediately after you finish painting, even when you’re tempted to let them sit for a day or two. Letting them soak in paint thinner isn’t a good alternative either; it will just weaken the glue holding the bristles in place.

Although it may seem like a lot of effort, good care and cleaning of your brushes will help them last longer and stay functional throughout their lifespan—keeping you from the frustration of using worn out tools, and ultimately saving you money.


- The Oppidan Escape

6.1.15

The Many Types of Art Desks for the Artist in You

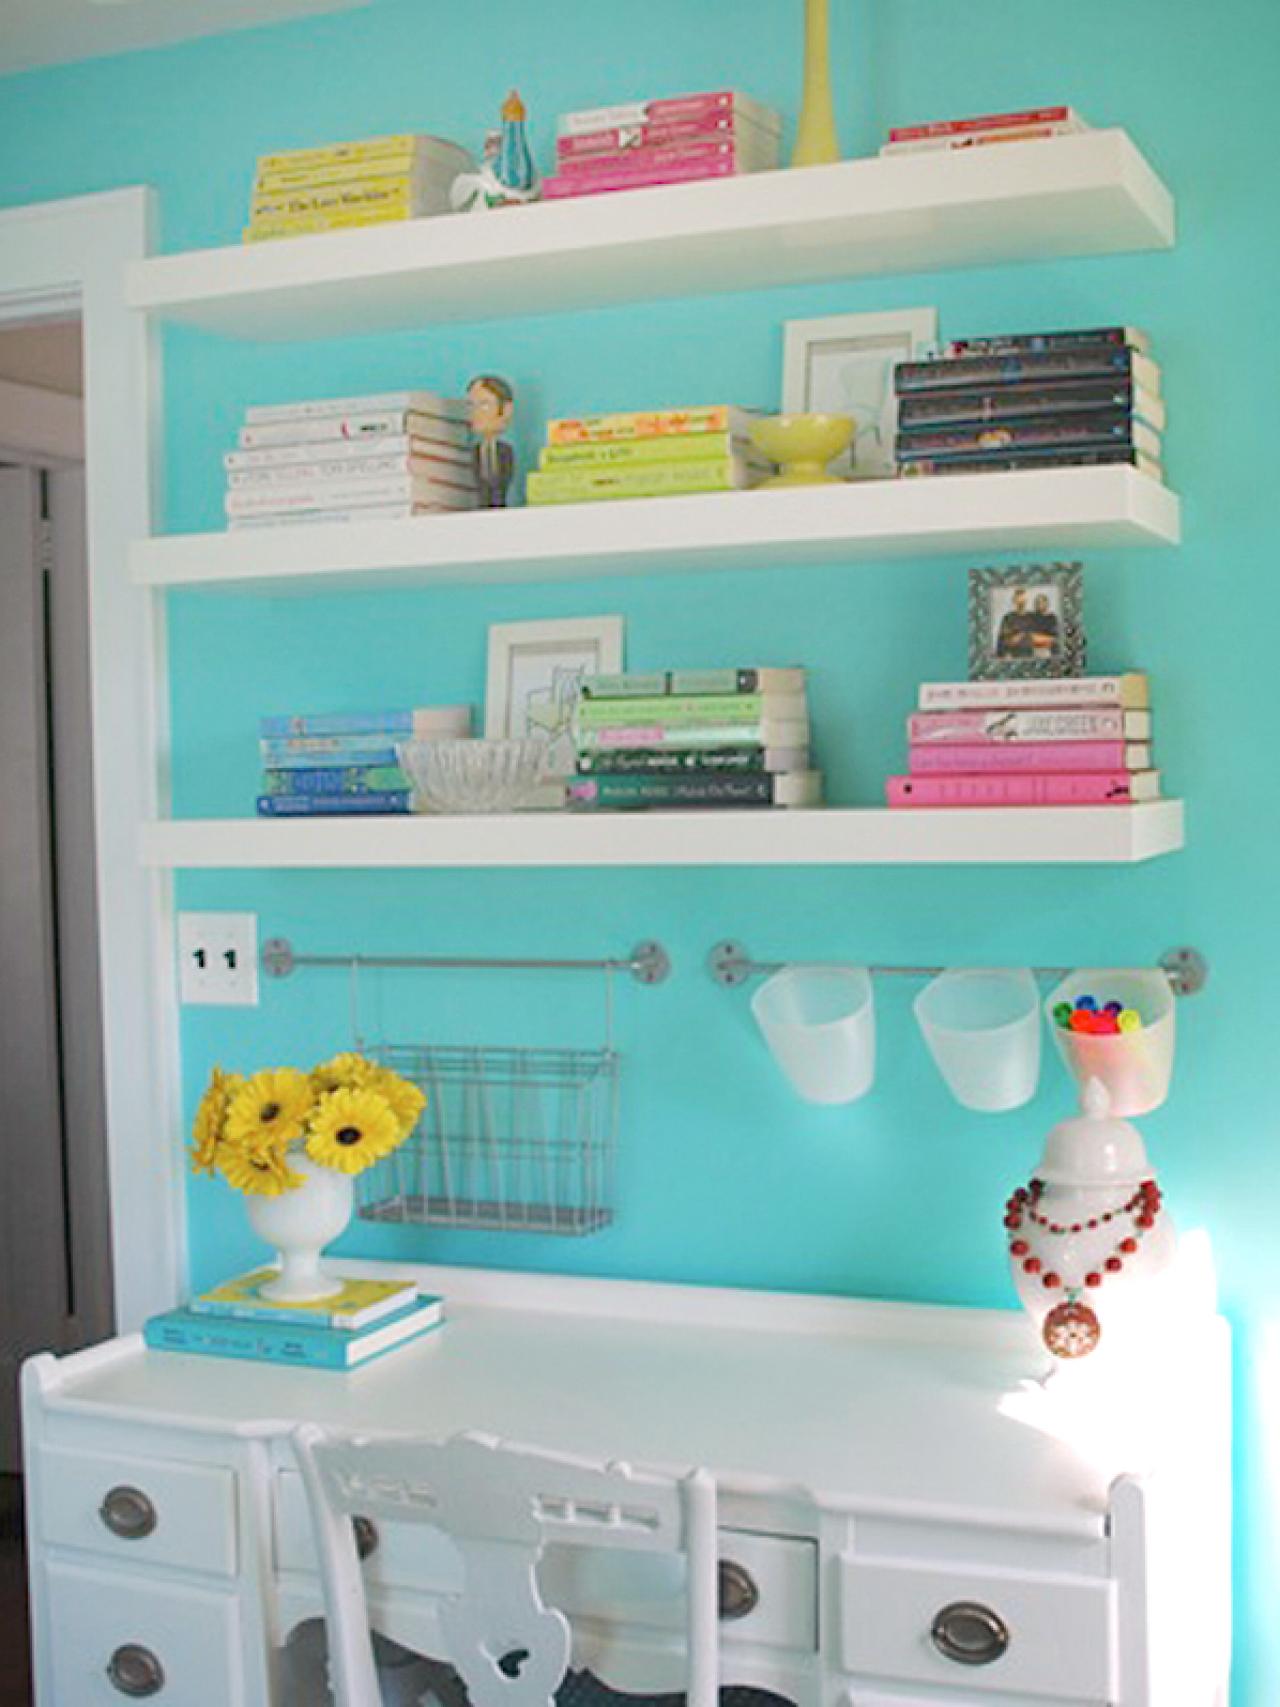
photo credit: hgtv.com

Art desks help you express your artistic flare through canvas support . There are many kinds of art painting projects out there that you can do with the use of an art table. From the simplest color applique of acrylic paints down to performing the many forms of oil painting techniques you can think of, these art projects can be achieved with the help of art tables.

Art tables come in many different forms and sizes. Choosing the best art desks would have to depend on the need and the skill of the artist involved. Also, the art  desks you see in stores or in your own home are not only limited to providing  you support with your painting projects. Here are some helpful art desk types that can provide as much comfort and support as your own art table at home.


THE DIFFERENT TYPES OF ART DESKS


Nail Art Desk – these are created from high grade materials, durable and sturdy. Has a soft and smooth surface, also equipped with storage for nail art tools and different nail polish colors. Some of the models are equipped with a blower for faster drying time.

Art Lap Desk – these are portable boards for the artist on the go or if table art are not available. Usually placed on the lap of the artist, which are available in various styles, shape, colors and sizes. Some of the models are created with a handle for easy carrying while others are with a large storage compartment and cushioned bottoms.

Arts and Craft Desk – made from sturdy steel frame and a powder coated finish. Can be used for sketching, creation of friendship bands, clay molding and a lot more.

Folding Craft Station – made from heavy gauge steel, can be folded for easy storage. Equipped with removable side trays, storage of art supplies. Also has pencil ledge, can be used for your table top easel.

Dual Station Table – are usually used in art teaching institutions. These are also available in four station drawing table. Equipped with a ratch tilting mechanism which allows to be tilted when needed.

Kids Art Desk with Storage – these are available in various designs and styles, usually equipped with storage bins for art materials.

Split Level Table – a three in one workstation which can be configured as standing height workstation, computer desk and drafting table.

Art Deco Desk – usually used to display art products or the table itself can be displayed as a stunning work of art. These are available in various designs and styles. These can be used as a work station and are equipped with drawers for storage of various art materials.


These are just some of the many art tables that are available in the market. Each of these tables are also available in numerous models for you to select from. These can be purchased from your online stores and local market. Do your homework and explore for more different kinds of art tables that would best suit your needs!


- XoXo

More Acrylic Painting Tips and Tricks You Should Try

One big advantage of acrylics is there wonderful versatility. This means that using acrylics you can achieve many different effects and use a variety of styles. For example, acrylics can be applied either very thickly or very thinly and all sort of combinations in between. The consistency and texture of acrylics can be changed with acrylic medium and gels, or pastes to create a variety of effects. For instance, you can use a glass bead or sand gel to create startling textures. Otherwise you can mix in clear tar gels to make a stringy, thick tar-like consistency that is used for dripping. Various acrylic additives can also be added to change the sheen of the paint, either to make matte, semi-gloss or high gloss sheens. There are a huge range of interesting gels, pastes and mediums to add to acrylics to create various effects and textures.

photo credits: wiki.answers.com
Acrylic paint is also very versatile and can be used for various mixed media applications, which broadens its appeal. Acrylics can also be used on a variety of surfaces - wood, canvas or paper. But once primed up with gesso, acrylics can be applied on almost any surface such as fabrics, clothes, clay, old vinyl records, boots and shoes and of course on house walls. Acrylics can also be applied using a variety of tools - such as spatulas, scrapers, Q-tips, toothpicks, sponges and lots more to create various effects.

The final finish of the acrylics on the painting can be altered to have a gloss, satin or matte finish. You can even use different finishes on various parts of the painting. When properly varnished, acrylic paintings do not need require a glass covering, so they can be hung straight onto the wall. You can even paint the edges of the canvas to create an interesting effect. If the paintings collect dust, you can simply wipe the surface over gently with a damp cloth.


TIPS AND TRICKS


Keeping Acrylic Paints Workable, Stopping them Drying Out - Because acrylics dry so very fast, squeeze only a small amount out of a tube at a time. If you're utilising a traditional wooden or plastic palette buy a squirt bottle so that you can spray a fine mist over the paint to keep it moist. The special 'Stay-wet' palettes – where the paint sits on a sheet of wax paper overlying a damp piece of waterproof paper does the same thing - keeps the paints moist.

Blot your Brushes - Keep a some paper towel or a piece of cloth besides your water container and get into the habit of always wiping your brushes on it after you rinse tem in water them. This stops water from running down the ferrule and onto your painting, leaving blotches.

Opaque or Transparent - All acrylic paints are opaque if applied straight from the tube or with only a tiny amount of water added – or if the paints are blended with a white paint. However, when diluted with water acrylics can be utilised like airbrushing or watercolours and the paints become transparent.

Acrylic vs Watercolour Washes - When an acrylic paint wash dries-out, it is fixed and permanent. Unlike a watercolor the dry paint is insoluble and can be over-painted without any concerns that the wash will be affected. The hues of the various layers combine optically to produce a unique effect. A watercolour glaze can be removed using water and a cloth, whereas the acrylic one is permanent and cannot be removed, but it can be painted-over.

Think Thin for Glazes - If you want to produce transparent glazes using acrylic paints the technique is to build them up in thin successive layers. Note that a thick layer will produce a glossy rather than a transparent look.

How to Improve the Flow of Paint Without Losing Color - To improve the flow of a color without losing of the strength of the color via dilution with water, always use flow-improver medium not just water.

Blending Acrylic Paints - Acrylics paints dry rapidly and so you have to work fast if you want to blend colors. One trick is to dampen the paper or other surface slightly as this will increase the time the paint can be re-worked.

Marking Hard Edges - Because Acrylic paints dry hard and bond permanently you can use masking tape applied directly onto the dried acrylic paint without threatening to damage the layer underneath. This tape makes it easy to produce a sharp or hard edge, similar to the method used wen painting a house. Make sure all the tape edges are stuck down very firmly and be careful painting along the edge. Don't apply the paint thickly otherwise you won't produce a sharp line when you lift the tape. Apply an even coat and be aware where you will have to lift the tape.

Using Masking Fluid - Masking fluids can be used just as effectively with acrylics washes, as they are with watercolors. Make sure the fluid is completely dry before you attempt paint over it, and don't paint too thickly. Masking fluid works on both paper and canvas. It is a good idea to experiment first to get familiar with the technique before using it on an important painting. Keep washing your brushes out with water and once the masking fluid dries it will ruin the brush. A good trick is to dip the brush into some detergent such as shampoo or washing-up liquid before using the brush for masking fluid as this makes it easier to clean the brush.

Using Acrylic Paint as a Glue for Collage - Provided the acrylic paint is used as a thick coat and the item to be glued is not very heavy, the acrylic paint will act well as a glue in a collage. This saves time and avoids the need to cover-up the glue. 

Watercolor Effects - Many painters like to use acrylics in a very fluid state, to create an effect similar to watercolor. There is a major difference, however, as with acrylics, the dilute washes can be layered one on top of the other without the risk of disturbing the colors underneath, provided the layers are dried thoroughly between applications. Once a layer dries it becomes fixed and is insoluble in water. One disadvantage is that the color layer cannot be in modifying once it starts to dry. You can however still avoid this problem using two methods. You can either wet the paper before starting to apply the paint. Or you can use an extra brush dipped in water. Immediately after using another brush to apply the paint use the wet brush to soften the edges and slow the drying.

Dripping and Pouring Techniques - This technique requires a very fluid acrylic paint that is poured directly onto the canvas. Or you can dip a brush, dipping it into the fluid paint and allowing it to run off the brush onto the painting.

Sgraffito or Scratching Techniques - Sgraffito refers to a scratching technique. It involves scratching into the top layer of partially dry paint to reveal either the wet base layer or the dry color beneath. You can use various tools for this technique, including screwdrivers, toothpicks or a sharpened end of an old paintbrush handle.

Making Use of a Squeegee - Even a standard squeegee that you can buy at any hardware store can be use to create interesting effects. You can also buy various tools of various shapes with foam rubber attached. To use this technique first squeeze out some blobs of paint along one edge of your support. You can add a series of colors. Then using a single fluid motion drag the paint across the surface or your painting with your squeegee mixing and smearing the paint in a single motion.

Use High Quality Paints - When you start and you are still learning it is best to use cheap paints. But for your final paintings always use high quality paints and brushes. The best quality paints have consistent and brighter colors.

Don’t Skimp on Paint - Trying to skimp of paint to save money is a bit mistake. Your paintings will be more interesting and 'alive' if you lay down a brush stroke with a full load of paint, leave it without any changes, and then reload your brush for the nest stroke. Don’t try and scrub the paint into the canvas or rework the paint unnecessarily, otherwise you will end up just staining the canvas or paper, and not really painting. The paintings look best when you don't skimp on paint.


- XoXo
post credit: hubpages

4.12.14

Art Jokes: You Must Be An Artist If...

A humorous look at the things you do that indicate you're an artist.


photo credit: wall321.com

What are the signs that you're an artist? This collection of definitions of what makes an artist started with a comment on the Painting Forum from Hamlet which got the rest of us going...! We're not telling which of these art jokes originated with us, nor how many definitions apply to us as well, except to say that all artists have never dunked a brush in their coffee... Yet!


  • You were more concerned about the color of your car than the fuel consumption.
  • The highlights in your hair are from your palette and not Clairol.
  • You are having lunch with the girls and the fragrance you wear is eau d'linseed oil.
  • The only piece of new furniture you have in your home is a $2000 easel.
  • You butter your toast with your fingers, just to feel its texture.
  • You think about taking a picture to a show.
  • You talk about going to a show where the pictures don't move.
  • You are over 50 and still have no health insurance.
  • Your family takes out a life insurance plan on you for less than $5000.
  • You know what shade of green the lichen on the trees is.
  • You can't find a nice outfit for your date because everything has paint smears on.
  • Your date ends up with paint smears on her/him.
  • You're late for the date because you suddenly knew exactly what that detail of your latest painting needed and just had to fix it while it was fresh in your mind.
  • You chose to buy that new Russian Sable Number Six Round instead of a Big Mac, a Large Fry, a Milkshake, Desert, and five gallons of gas.
  • Your favorite home repair store refuses to work with you to repaint your den, because you rename all of their paint swatches and you get upset that they don't carry the exact nuance of raw umber you had in mind.
  • You purchase a ton of books, and most are blank inside.
  • When viewing a sunset, you think in terms of cadmium yellow (light hue), salmon and gold, a tinted teal mixed with gold for the water...."
  • Strangers save your 'regular' spot at the park, perfect for observing children and pigeons.
  • There are Prussian blue fingerprints on your phone.
  • You stay awake late at night wondering how to render on canvas the dimly lit shapes and the shadows in your room.
  • When you go out, you are always stopping and gazing at the world around you.
  • You travel far to sketch a place of scenic beauty.
  • You clean your brushes in your coffee.
  • You carry pencils instead of pens.
  • You have watercolor swatches on cardboard in your pocket. 
  • You explain your deplorably bad housekeeping by saying, "it's a work-in-progress..."
  • You do judge a book by its cover.
  • You watch the latest kids' digital animation movies and drool over the effects as much as the story.
  • You bought paint instead of food!
  • You paint more than you talk.
  • You draw your letters instead of write them.
  • You like to get plastered and paint the town red.
  • You're in love ... with your studio.
  • You know that art does not match your sofa.
  • If dust bunnies are part of your mixed media.
  • You buy expensive brushes, and have nothing to do your hair with.
  • You get a feeling of calmness from holding and stroking the bristles of your clean paintbrushes.
  • When going on a quick errand in your painting cloths you're finding people rave over the 'fashion statement' you didn't even realize you were making.
  • You know the difference between beige, ecru, cream, off-white, and eggshell.
  • You know more than 28 colors.
  • You get excited about football season because it means your significant other will finally be sitting still on the sofa long enough for you to paint him.
  • At the gym you take note of the instense facial expressions of the heavy lifters.
  • You never look at a person's face as a whole. You break it up into shadows and lines and shapes, and think how they would look on a canvas.
  • When others are needing to be with the in crowd, you feel lost in the crowd.
  • You long to be alone with your thoughts while others are lonely without much thought.
You can read more about funny jokes about arts and artists here.

Aren't these jokes hilarious or what? If you find these jokes intertaining, congratulations you truly are an artist at heart! Don't forget to share this post with fellow artist and friends on Facebook and Twitter. Thanks!


-XoXo
post credit: about.com

Overcoming The Fear of a Blank Canvas

photo credit: spindelmaker.com

First the good news: you're not alone in this by any means. It happens because we want a painting to come out right; the fear that the result will not be what we imagine paralyzes us. It's also been a while since you've painted, so your skills are rusty; what you're doing now doesn't match what you know you're capable of and that's also inhibiting. It's also because we see our paintings as part of ourselves, not as product; we invest a piece of ourselves in them and want them all to be perfect, which is never going to be possible.

"The development of an imagined piece into an actual piece is a progression of decreasing possibilities, as each step in execution reduces further options by converting one -- and only one-- possibility into a reality. ... the piece you make is always one step removed from what you imagined... after all, your imagination is free to race a hundred works ahead, conceiving pieces you could and perhaps should and maybe one day will execute -- but not today, not in the piece at hand. All you can work on today is directly in front of you. ... art materials seduce us with their potential."

In terms of practical things to do, don't set out to do a finished, complete painting. Do small studies, say an apple and its shadow, a vase, a hand, or an eye. Something that can go wrong or be reworked many times because it's just a learning piece, not a 'real' painting.

With drawing you could take a piece of charcoal and cover the whole sheet, then rub it in with your hand. Then draw back in with a plastic eraser. By doing this you've already mucked up the whole sheet of paper before you start, so anything you do can only be an improvement.

If you've got some paintings you've done that you like, or like parts of, put these on display to remind yourself that you can do it. If you've done it once, you'll be able to do it again. Painting requires perseverance not talent.

Let's give Vincent van Gogh the last word on the issue of intimidating blank canvases:

"You do not know how paralyzing that staring of a blank canvas is. It says to the painter, you can't do anything ... Many painters are afraid of the blank canvas, but the blank canvas is afraid of the really passionate painter who is daring."

Are you ready to conquer your fear of a blank canvas?

What are your thoughts about the subject matter? Let your thoughts be heard by adding it to the comment section below. Also, don't forget to share this with family and friends on Facebook and Twitter. Thanks!


-XoXo
post credit:  about.com

17.11.14

10 Beginner Tips for the Acrylic Painting Artist in You!

photo credit: good-wallpapers.com

Acrylics are extremely versatile, fast-drying paints, and can be used straight from the tube like oils or thinned with water or a medium and used like watercolors. And a lot in-between. Here are a few tips to help you get started painting with acrylics.


Tip 1: Keeping Acrylic Paints Workable

Because acrylics dry so fast, squeeze only a little paint out of a tube at a time. If you're using a 'normal' plastic palette invest in a spray bottle so you can spray a fine mist over the paint regularly to keep it moist, and thus usable.'Stay-wet' palettes – where the paint sits on a sheet of wax paper place on top of a damp piece of watercolor paper – eliminate the need to do this, but generally don't have a hole for your thumb so are more awkward to hold in your hand.

Tip 2: Blot your Brushes

Keep a piece of paper towel or cloth next to your water jar and get into the habit of wiping your brushes on it every time you rise them. This prevents water drops running down the ferrule and onto your painting, making blotches.

Tip 3: Opaque or Transparent Colors

If applied thickly – either straight from the tube or with very little water added – or if mixed with a little titanium white, all acrylic colors can be opaque. If diluted, they can be used like watercolors or for airbrushing.

Tip 4: Acrylic vs Watercolor Washes

When an acrylic wash dries, it's permanent and, unlike a watercolour wash, is insoluble and can be over-painted without fear of disturbing the existing wash. The colors of subsequent washes mix optically with the earlier ones. A watercolor glaze can be lifted out using water and a cloth.

Tip 5: Think Thin When Thinking Glazes

If you want transparent glazes, these should be built up in thin layers, so the colors beneath show through. Use the brush to spread the paint out thinly across the surface.

Tip 6: Improve Flow Without Losing Color

To increase the flow of a colour with minimal loss of color strength, use flow-improver medium rather than just water.

Tip 7: Blending

Because acrylics dry rapidly, you need to work fast if you wish to blend colors. If you're working on paper, dampening the paper will increase your working time.

Tip 8: Hard Edges

Masking tape can be put onto and removed from dried acrylic paint without damaging an existing layer. This makes it easy to produce a hard or sharp edge. Make sure the edges of the tape are stuck down firmly and don't paint too thickly on the edges, otherwise you won't get a clean line when you lift it.

Tip 9: Washing-up Liquid with Masking Fluid

Masking fluid or frisket can be used with acrylics washes, as well as with watercolors. Be sure it's completely dry before you paint over it, and don't paint too thickly over it or you'll have to scratch away the paint to get to the masking fluid. Masking fluid will work on paper and canvas, but do try it out first before using it in a painting to get a feel for it. Once masking fluid has dried in a brush, it's nearly impossible to remove. Dipping a brush into some washing-up liquid first makes it easier to wash masking fluid out of a brush.

Tip 10: Using Acrylic Paint as a Glue for Collage

Provided it's used fairly thickly and the item to be stuck isn't too heavy, acrylic paint will work as a glue in a collage. Simply apply some to the surface, like you would glue.


Who would have thought we would find new uses for these not so subtle materials. Have you tried any of our tips? Do you have something to add? Feel free and let your thoughts be heard by jotting it down in the comment section below. And while your at it, don't forget to share this post with family and friends on Facebook and Twitter. Thanks!


-XoXo
post credit: about.com

16.11.14

Art Basics: Symbolic Drawing and Painting

photo credit: tera.school.nz

While not everyone may have learned to draw and paint realistically - drawing what they actually see rather than what they think they see - all of us have already learned to draw symbolically. As children we all go through stages of development in terms of drawing skills, one of which includes symbolic drawing, using a symbol to represent something else.

First there is the "Scribbling stage" at about age 12-18 months. This is mostly an enjoyable kinesthetic activity, incorporating many circular scribbles. At about 3 years of age comes the stage of symbols and stories as children discover that a symbol can stand for a real thing in the environment. Circles and lines come to represent many different things. According to Sandra Crosser, Ph.D. in her article When Children Draw, about the age of 3, most children begin to draw "tadpole guy."

"An important point is reached when the child converts the linear scribble into an enclosed shape. The enclosed shape seems to be the focus of the child's first attempt to make a realistic drawing. That first realistic drawing is frequently a primitive person. When lines are used as boundaries of objects we see a typical tadpole person, so named because it resembles a tadpole. One large circular shape with two lines extending as legs float on a page represents every man….Tadpole guy simply seems to be a symbolic, rather easy, and convenient way to convey the idea of a person."

Dr. Crosser goes on to say that "three- and four-year-olds develop other generic symbols for the repeated drawings of common objects like sun, dog, and house." At about age 8-10 children find that their symbols are limiting and try to draw more realistically, to capture how things actually look to them, but even as some progress to this stage of drawing, the ability to express ourselves through the use of symbols remains an innate human skill.

One artist who used symbols extensively in his artwork, and whose work has greatly influenced many other artists, is Paul Klee (1879-1940). As stated on the website TheArtStory.org about Klee:

"Klee was fundamentally a transcendentalist who believed that the material world was only one among many realities open to human awareness. His use of design, pattern, color, and miniature sign systems all speak to his efforts to employ art as a window onto that philosophical principle….Klee challenged traditional boundaries separating writing and visual art by exploring a new expressive, and largely abstract or poetic language of pictorial symbols and signs. Arrows, letters, musical notation, ancient hieroglyphs, or a few black lines standing in for a person or object frequently appear in his work, while rarely demanding a specific reading."

Klee had his own personal visual language and his paintings are filled with symbols and primitive drawings that express his inner psyche. Symbolism can in fact be a way to extract the inner workings of the psyche and discover more about yourself, and in so doing, to help you develop as an artist.


-XoXo
post credits: http://abt.cm/1xG7hVU

7.11.14

Easy Folk Art Painting Techniques

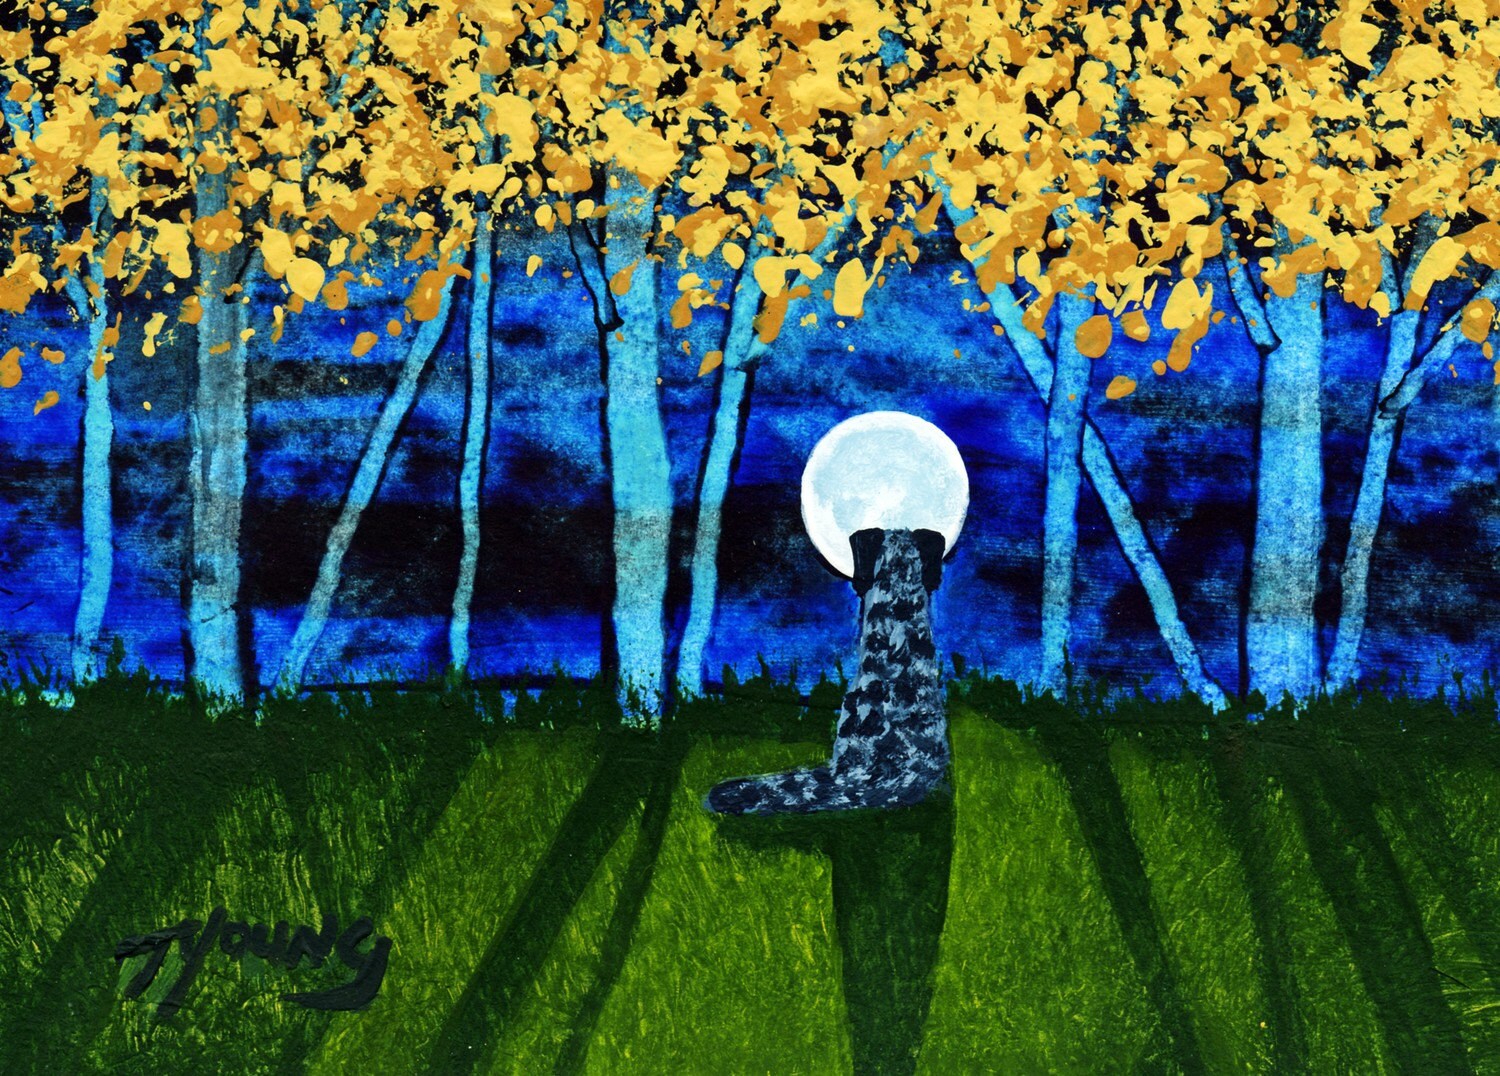
photo credit: etsy.com

Folk art painting refers to painting done in a primitive style. Often these paintings are of country themes such as farms or other rural objects. The proportions do not need to be traditional and the painter usually is not a professionally trained artist. Early American folk art is highly prized and can bring many thousand dollars at auction. For a more economical approach to decorating with folk art, paint some yourself.


Materials


Folk art painting techniques can be used for paintings, metal sculptures and even furniture. For beginners to create folk art, painting is the easiest to do because you do not need to strip or refinish the surface like you would for furniture or sculptures.

Paint is required but in folk art, the type of paint is actually not as important. You can use acrylic, water based or even oils. Since acrylic is less expensive and more forgiving to mistakes, it is the most often used type. Arts and crafts stores carry several brands. The key is to buy many colors so you can mix to match your project.

Brushes are also needed and depending on your project, you may need several. For paintings, plan to purchase a 1 inch stiff brush for background scenes. A smaller pointed tip brush will also be needed for more detailed work. If your project is furniture or large sculptures, you may also need a traditional 2 or 3 inch wide brush to paint base coats. You will still need to buy smaller brushes for painting details.

Other materials normally used by folk painters include sandpaper, gesso, glaze and crackle paint. All of these materials are to give the finished piece an aged appearance. For paintings you will also need a blank canvas which can be found at any art supply store. Carbon transfer paper is also helpful for beginners since you can choose an illustration and transfer the design to your piece.


Technique


To apply folk art techniques to paintings, you must first prepare the canvas. Apply two coats of gesso letting the canvas completely dry between coats. Gesso is a primer that allows your colors to adhere well to the canvas surface.

Choose an image you would like to paint by looking through folk art books or visiting a museum. If you are not planning to reproduce someone else's artwork, then design your own based on the room you intend to decorate. Simple scenes or objects best reflect the folk art style so make sure your plans take that into consideration.

If you want a background color other than the white gesso, paint that now using your larger brush. Make broad strokes so the canvas gets completely covered. If you are using a light background color, it is safe to paint the entire canvas because when you paint your actual design, the background color will not show through. If you plan to use a dark background color, then you will need to use the transfer paper first and paint around the design so the background color does not bleed through your finished design.

Sketch your design onto a piece of paper then use the carbon paper to transfer your design to the canvas. The design at this point should not have a lot of detail as that will be filled in once you actually start painting. The purpose of the carbon paper transfer is to get the basic lines onto the canvas so you have a place to start your painting.

Using your detail brush, fill in the design and add details as needed. Let it dry completely before adding any additional specialty paints. For a worn look, lightly sand along the edges of the canvas and in random areas using an up and down stroke. You can make an aged look by adding a brown glaze to the entire piece. First water down the glaze slightly and apply to the canvas. Wipe away any excess and let dry. The glaze seeps into the piece and gives it an antique look.

To add even more age, use crackle paint. Crackle paint is actually two different materials, one to set and the other to crackle. Apply the setting paint to the canvas and let dry. The setting paint dries clear so you can see the image and glaze underneath. Next, apply the crackle paint and let dry. As the paint dries, cracks form in the clear paint giving the entire canvas a crackle look.

That's just about it! It may sound easier than it looks but allow your inner-artist inspire your blank canvas and paint away. Share your creations or your thoughts in the comment section below and don't forget to share this post with your family and friends on Facebook and Twitter. Thanks!


-XoXo
post credit: http://bit.ly/1uFybOW

4.11.14

6 Famous and Historic Art Nouveau Masterpieces

photo credits: artistsandart.org

Art Nouveau emerged in England and spread throughout Europe and the United States. In Germany, it was called Judendstil, Sezession in Austria and Modernismo in Spain. Art Nouveau artists broke up with the 19th century historicism and used the world around them as a source of inspiration. Most artists turned to the natural world but they often also chosen erotic themes. The style flourished from 1890 to about 1910 when it was replaced by other modernist styles such as Expressionism and surrealism.


Education (Chittenden Memorial Window) by Louis Comfort Tiffany


photo credits: wikimedia.org
Thirty foot wide stained glass window was made by Louis Comfort Tiffany’s Glass Company in 1889-90. It was installed at the Yale University’s new library that was built in memory of Mary Harwell Lusk, a daughter of the University’s patron Simon Baldwin Chittenden. Tiffany’s Education was removed in 1970 as a safety precaution before the protests in New Haven Green. It then misidentified and forgotten for a number of years. And it was the misidentification which is thought to save the masterpiece because stained glass that has been mistakenly labeled as Tiffany meanwhile disappeared from the University’s basement.


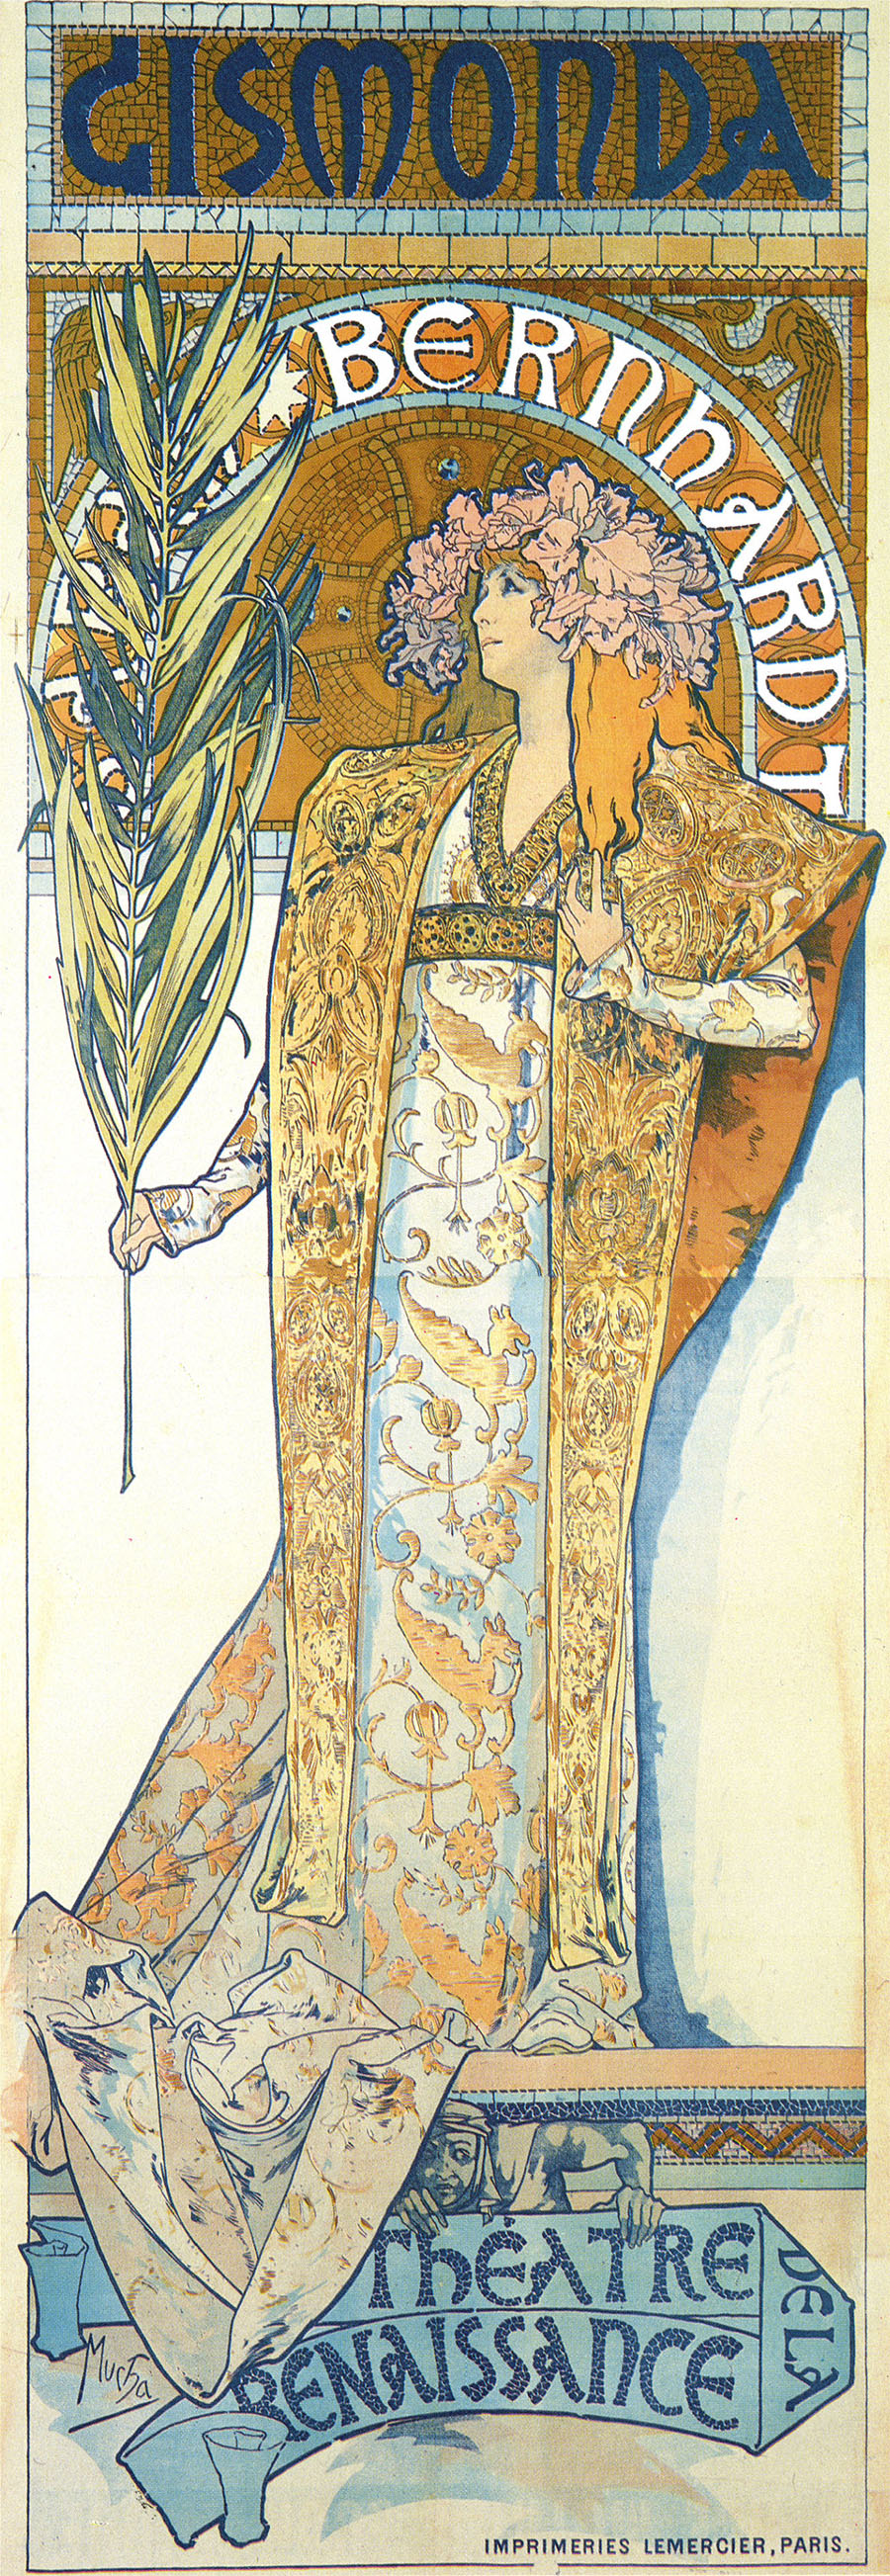
Gismonda by Alphonse Mucha


photo credits: codex99.com
photo credit: private-prague-guide.com
Lithograph poster by the celebrated Czech Art Nouveau artist reveals Mucha’s distinct style which had a major influence on Art Nouveau movement. The 216 x 74.5 cm poster was created in 1894 for the Victorien Sardou’s play Gismonda featuring Sarah Bernhardt. She is depicted on the poster wearing a costume from the last, fourth act of the play. Mucha’s Gismonda can be seen as a part of the exhibition Alphonse Mucha: An Insight into the Artist in Tokyo, Japan, from early March 2013.


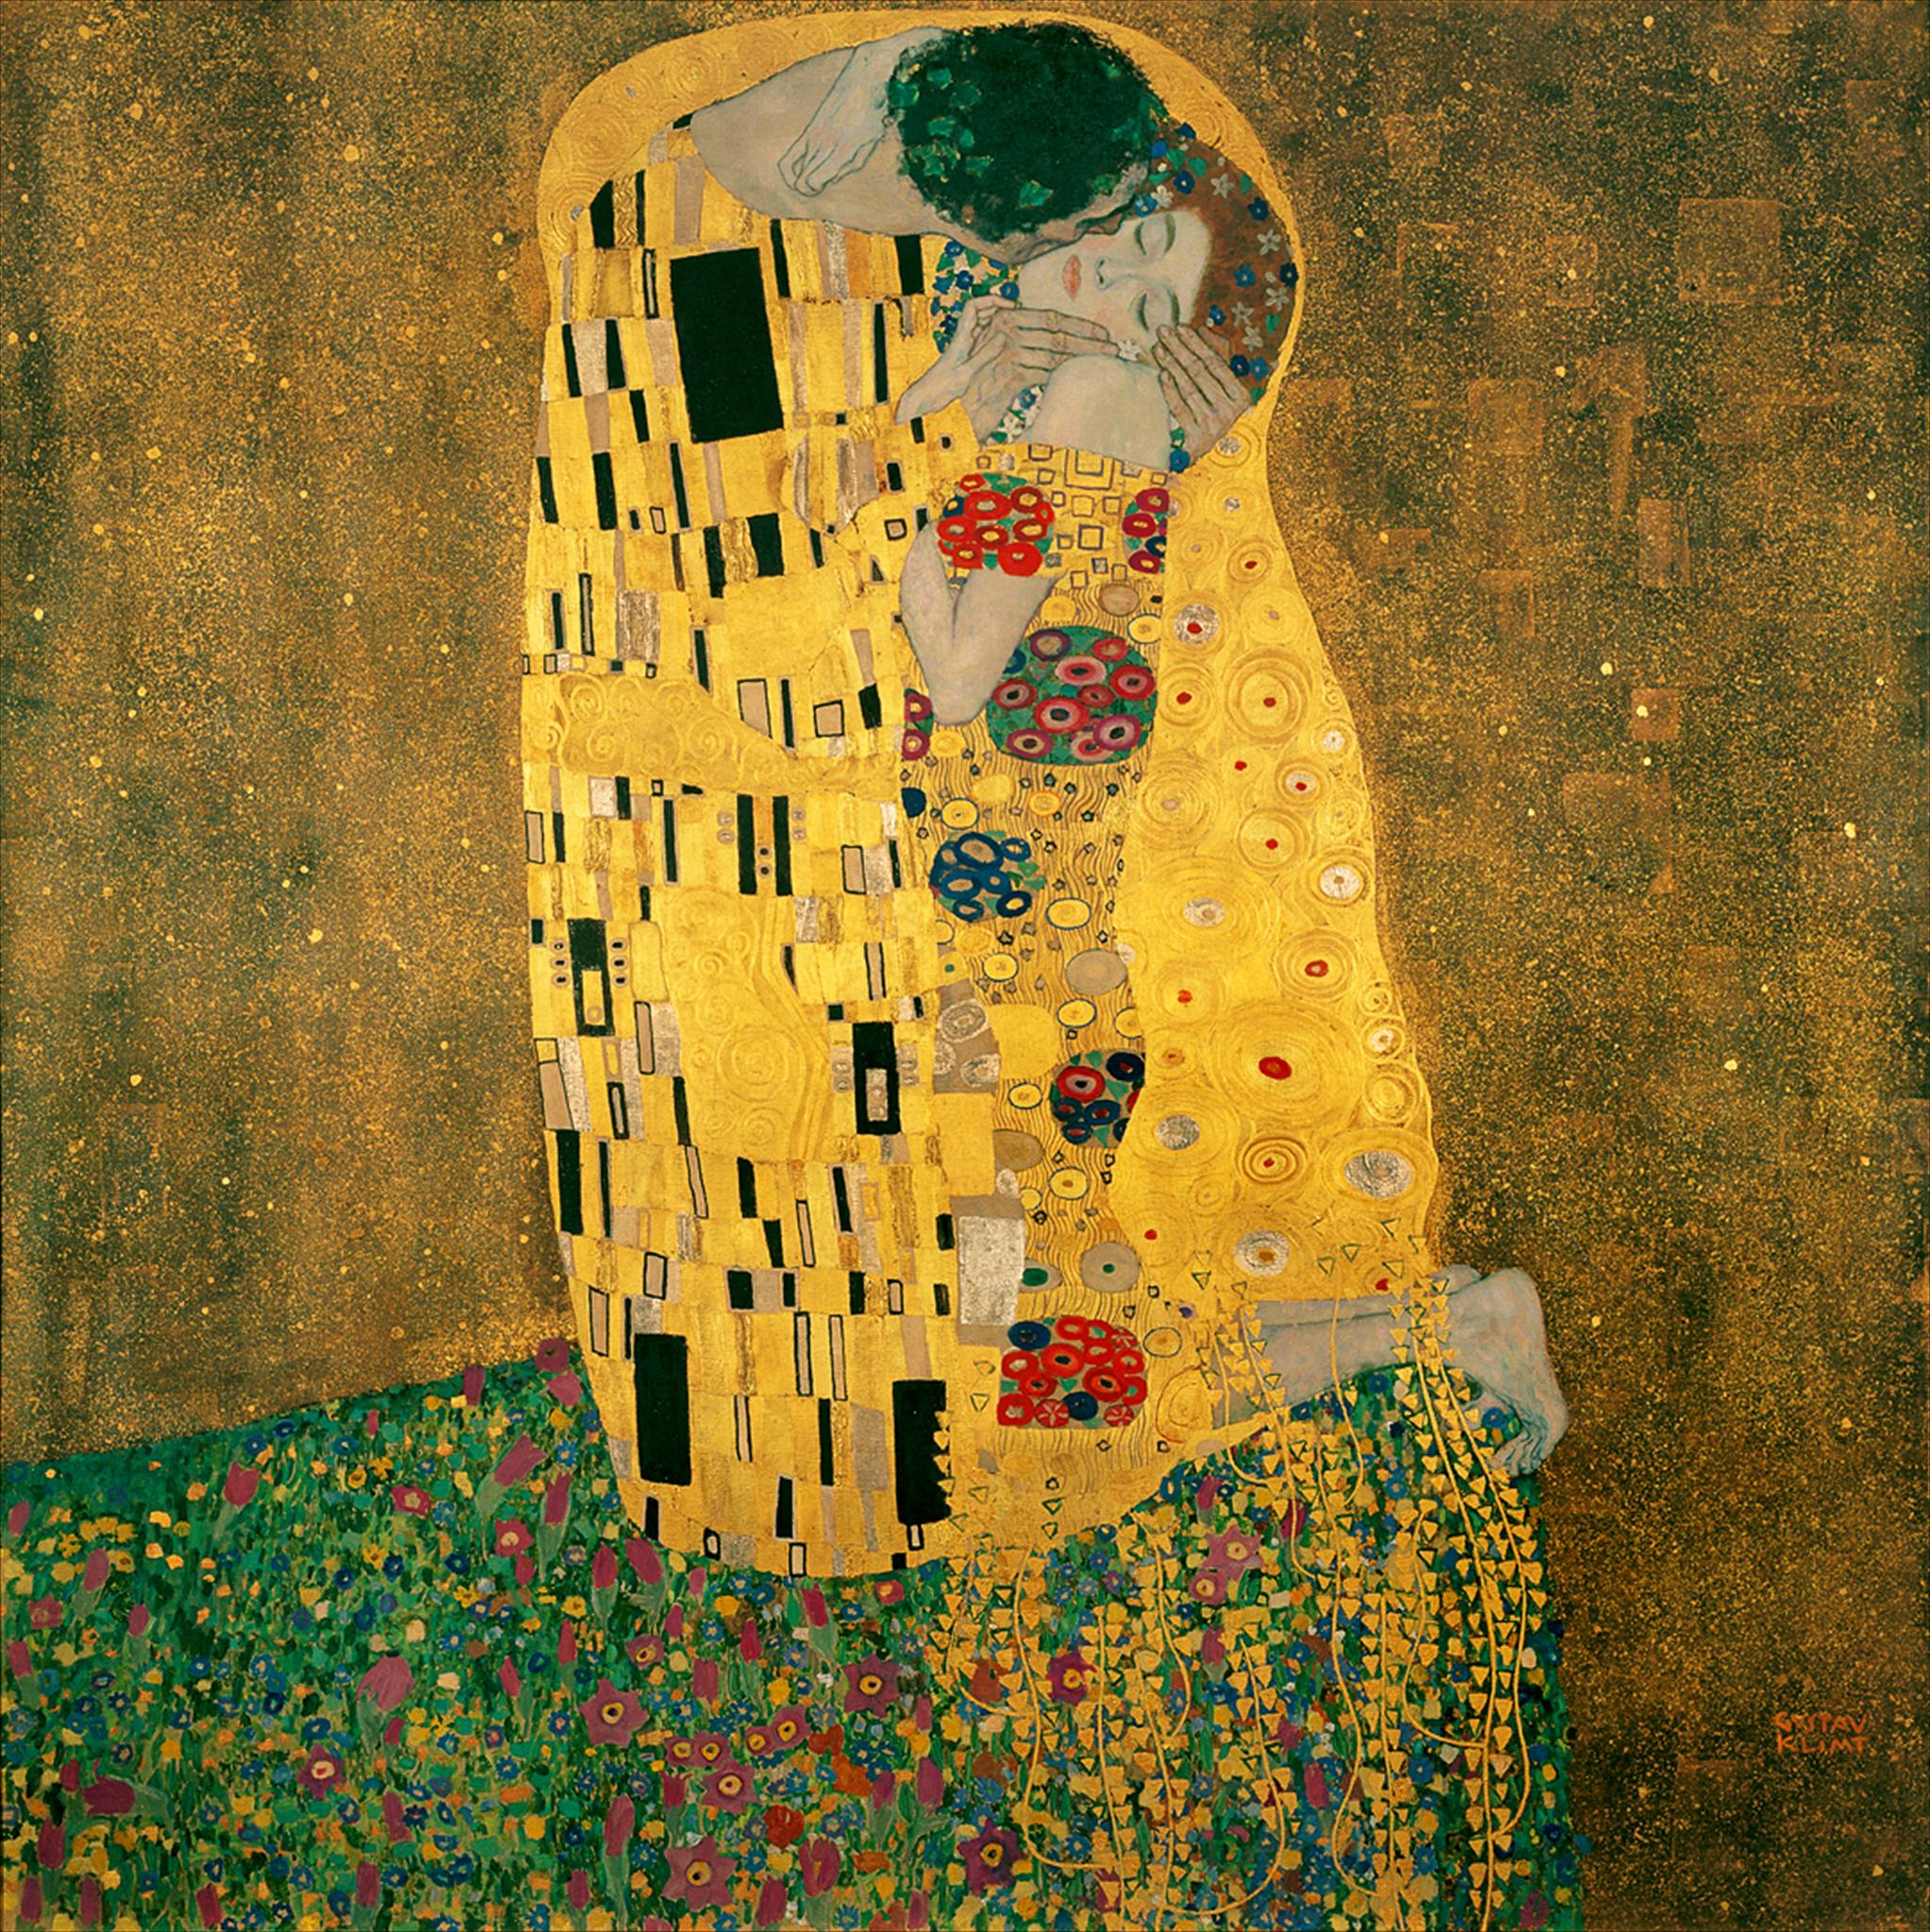
The Kiss by Gustav Klimt


photo credits: metafizikportakal.wordpress.com
The painting marks the height of the artist’s “golden period”. Klimt painted one of his greatest masterpieces between 1907 and 1908, using the traditional oil paint and gold leaf layers. But despite the spectacular depiction, the only features are virtually the faces and hands of the two lovers who are kissing on the edge of a cliff. The painting is owned by the Österreichische Galerie Belvedere in Vienna, Austria, where it is currently featured in a special exhibition in honor of the 150th anniversary of Klimt’s birth.


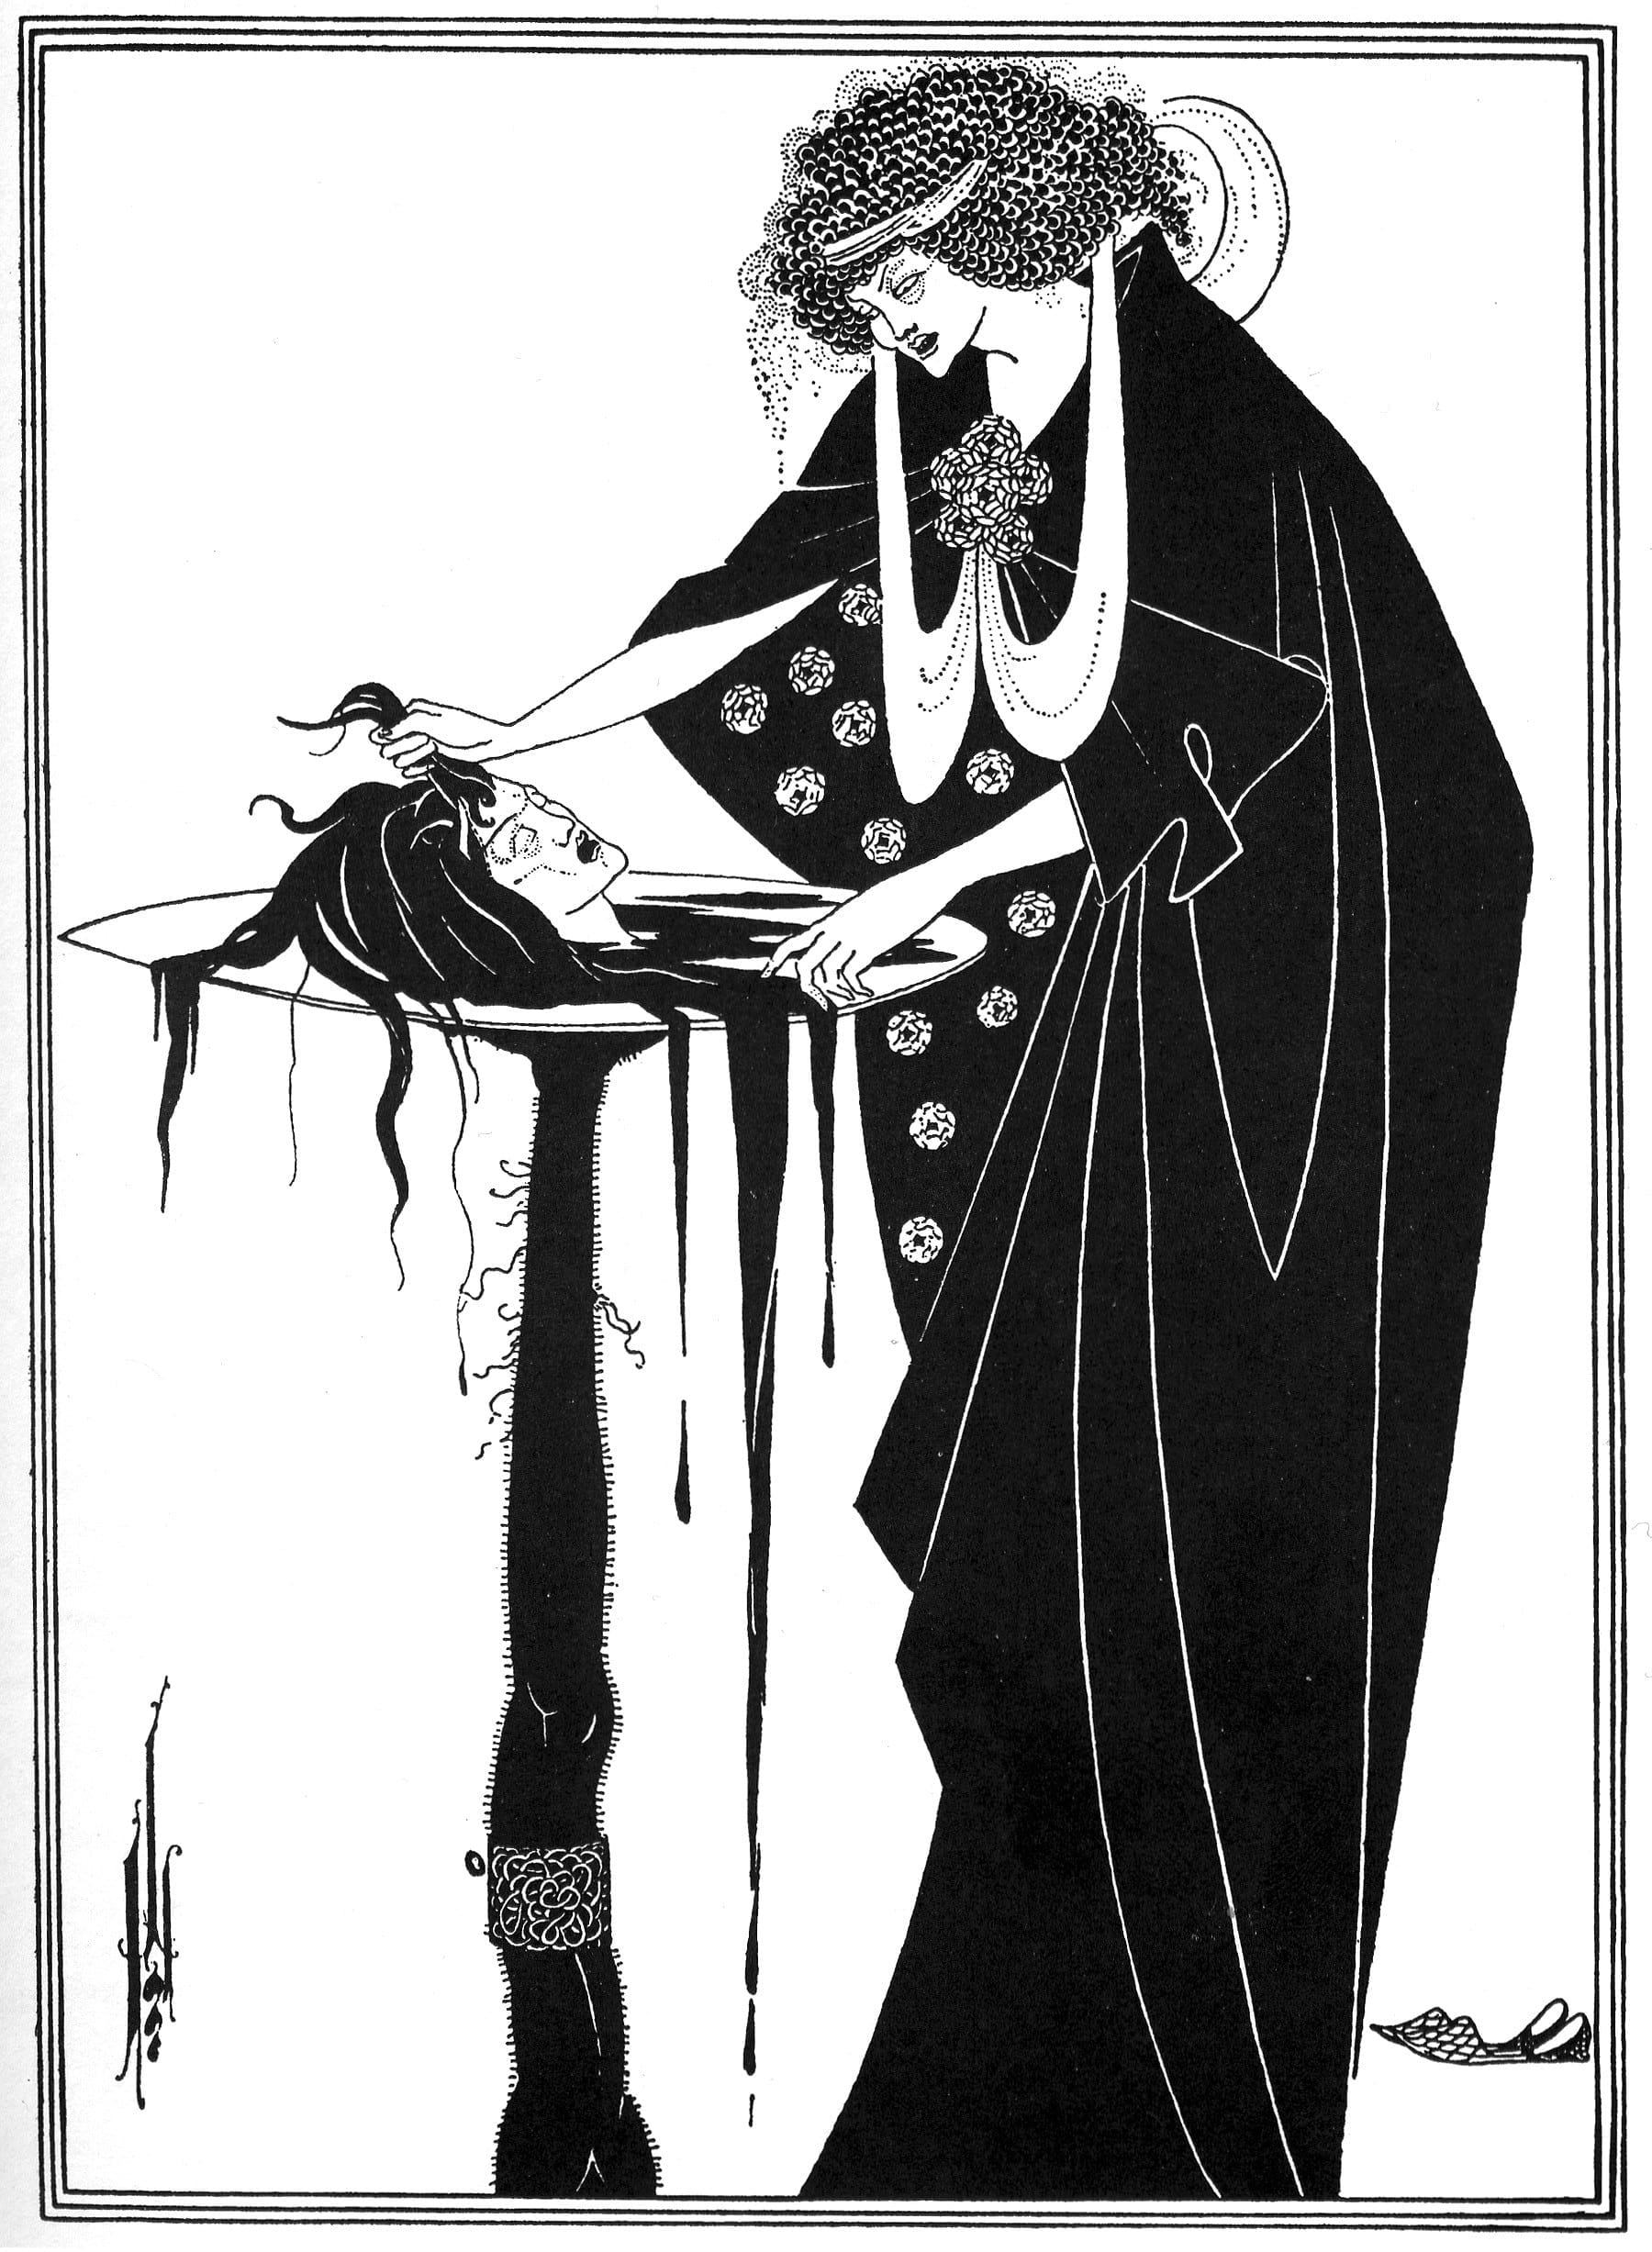
The Dancer's Reward (Salome) by Aubrey Beardsley


photo credit: markdery.com
The illustration for Oscar Wilde’s play Salome depicts Salome with the head of John the Baptist and justifies Beardsley’s reputation as one of the most controversial artists of the Art Nouveau movement. His black ink drawings were dominated by dark themes and grotesque erotica featuring large genitalia, especially those that have been inspired by Japanese shunga. Nevertheless, he had a major influence on other Art Nouveau artists of his era as well as many later artists.


Reclining Woman with Green Stockings by Egon Schiele


photo credit: wikimedia.org

The painting that was created in 1917, one year before the artist’s death belongs to the classics of the so-called Schile’s women. It emphasizes female sexuality in both appealing and controversial way. His style that also includes elements of Expressionism caused a lot of controversy and even got him in trouble. In 1912, he was imprisoned for his sexual portrays of very young female models that were viewed as obscene. Schiele’s Reclining Woman with Green Stockings is in private collection.


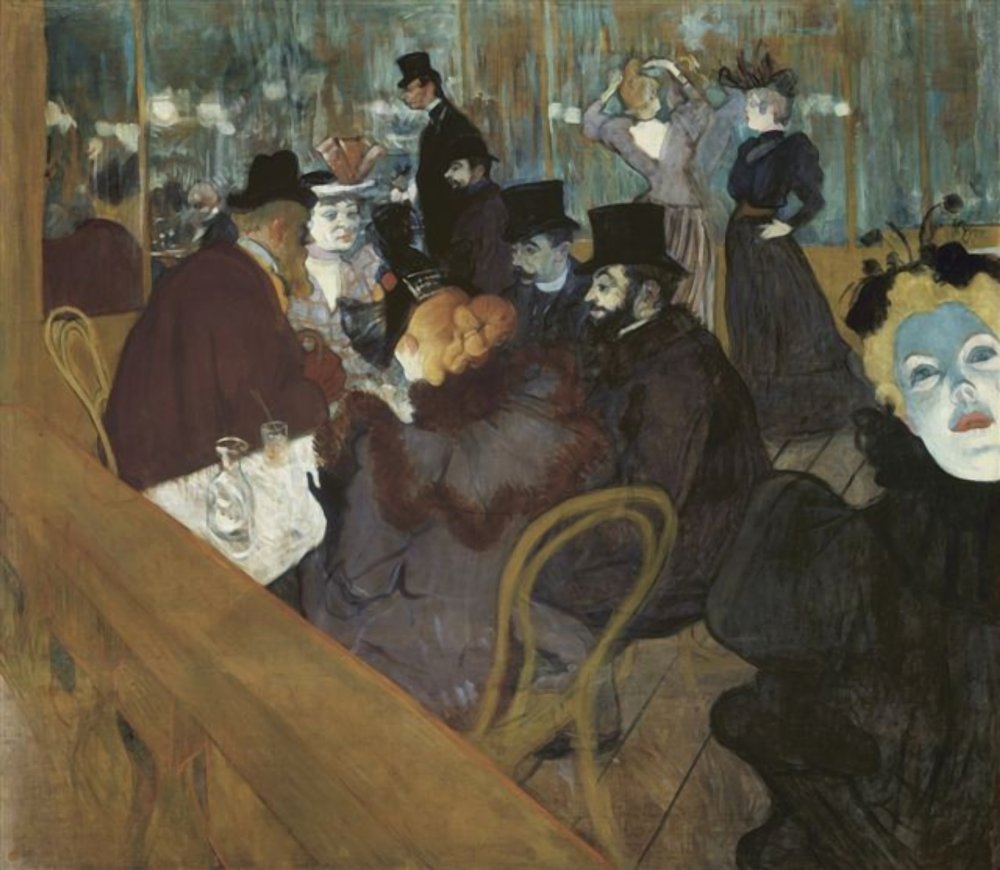
At the Moulin Rouge by Henri de Toulouse-Lautrec


photo credit: motslocaux.hautetfort.com

The oil-on-canvas painting depicts the Moulin Rouge cabaret that opened in 1889. The painting portraits three men and two women sitting at a table, the artist himself with his cousin and physician Gabriel Tapie de Celeyran in the background, the French can-can dancer La Goulue in the background and English singer May Milton in the foreground. The section that shows the singer’s face was at some point removed from the rest of the painting either by Lautrec or his dealer but it was later reattached. The painting that was created between 1892 and 1895 is a part of the collection of the Art Institute of Chicago.

There you have it folks, 6 great art nouveau masterpieces that every artist should know. Are you familiar with some of them? What are your thoughts on these iconic masterpieces? Send us your thoughts in the comment section below and don't forget to share this post with your family and friends on Facebook and Twitter! Thanks!


-XoX0
Post Credit: http://bit.ly/10sDnII