23.12.14

Are You Spending the Night Out? Don't Forget Your USB Condom!

photo credit: cdni.wired.co.uk

Don’t get carried away by the headline—don’t be surprised either. This topic does not come anywhere close to ‘sex’. A USB condom is not for humans, but for your smartphones and tablets.

When you are running out of juice on your smartphone or tablet, the first thing, you hunt for is a power adapter for the device. If you are not at home, you end up searching around for a free USB port on anything from a desktop PC or laptop to a media player or even a television set.

Plugging in your smartphone to an available USB port for recharging the device is done without thinking. Plug in and recharge. Though it sounds pretty simple, it could cause havoc in your life.

Your smartphone contains immense data that can be stolen and used against you. Your pictures, selfies, data, music, pin codes, app data, almost everything that is on your smartphone is useful to someone out there. So when you plug in your smartphone to any unknown computer’s USB port, a possible malware residing on that PC or laptop could pull your smartphone’s data without you knowing it. If you are heading to your friend’s place, you may think you are safe. But even your friend could be in the dark with viruses and malware lurking around in his computer. Not only data being hacked, getting infected by the malware also be an additional threat. You could get the malware transferred to your device (and vice versa).

So what is the best option to charge your smartphone without the fear of being hacked or infected? The first-best solution is to either carry your charger along or to buy yourself a portable USB charger. The next-best solution is to get yourself a USB condom.

photo credit:makingsmilesonline.com

As the name suggests, a USB condom is similar to a regular condom. It is a super simple device or gadget (dumb gadget actually), which cuts off the data section of the USB port and only passes the power through. This causes an isolation of the PC and the smartphone and only ensures that the power is passed on to charge the device.

A standard USB 2.0 port contains four pins—one for +5V power, one for ground and the other two for data. The USB condom is just a simple USB extender with the data pins cut off. Only pins 1 and 4 are used, while pins 2 and 3 (for data) are not connected. This gadget is pretty small and can be plugged into your USB cable at all times. When you need to sync your smartphone with the PC, simply disconnect it.


-XoXo
post credit: http://goo.gl/sjbD2t

19.12.14

Keep Your Holiday Party Makeup in Place All Night with these 7 Easy Steps

photo credit: frillseeker.ie

The season for socializing is upon us and our calendars are filled with holiday house parties, work happy hours, and of course, New Year’s Eve. It’s a time for cocktail dresses and smoky eyes, sequins and red lips. We all want to look our best, and we usually do when arriving at our destination. But what about after a few hours of nibbling on hors d'oeuvres, sipping champagne, and hitting the dance floor? Not so much. So we reached out to M.A.C Cosmetics senior artist Keri Blair to teach us how to keep our makeup in place, so we can have a holiday party exit just as grand as our entrance.

Prep your skin. Prepping your face before applying makeup is essential if you want to keep things in place all evening. First, apply a light moisturizer evenly all over your skin and follow with a makeup primer.

Apply lip liner on your entire lip. Choose a lip liner that is close to your favorite holiday shade and apply it all over your lip as if it were lipstick. Then, apply your lipstick over that. This will keep your color vibrant and make it last even after all the eggnog.

Wear lip gloss over your lipstick. To be extra safe and make sure that lip lasts, apply a light layer of clear gloss over your lipstick. This will give it a festive shine and seal the color in for even longer wear.

Try a caffeinated eye cream. It’s a given that your holiday schedule will encroach on your sleep, but that doesn’t mean you have to arrive to the party with dark circles under your eyes. Before you apply concealer, prep your under eye with a cooling and caffeinated eye cream. These caffeinated eye creams are wonderful for a night-out because it contains a high-octane dose of caffeine powder and yeast extract that helps to de-puff and create a smoother, brighter under eye area even after midnight.

Highlight under your eye. For an extra boost of brightness that will last until the wee hours of the night, apply a light layer of highlighting powder after your makeup in an inverted triangle under your eye. Brush it on, then tap it into your skin using your finger.

Set your makeup with atomized water. To keep your makeup looking fresh, dab a few drops of atomized water on your face with your fingers or a cotton ball after you apply the finishing touches.

Keep blotting sheets in your purse. After all the drinking and dancing, many of us end up with a layer of sheen across our foreheads—and not the “Oh, you’re glowing,” luminescent kind. Your knee-jerk reaction may be to apply powder, but instead of adding more makeup, dab a blotting sheet on your face to remove excess oil and shine without disturbing the makeup that’s already there.


-XoXo
post credit: elle.com

18.12.14

3 Efficient Ways to Snuggly Protect Your Smartphone this Holiday Season Like A Hen to its Clutch of Eggs

photo credit: timedotcom.com

Smartphones are the most expensive, abused and neglected devices we depend on. We toss them on our car seat, drop them off the night table, sit on them, drop them on the driveway and, yes, drop them in the toilet.

It doesn't take long to show wear and tear on a brand new phone. Despite your initial cradling, nicks on body edges and screen scratches build up quickly, taking the newness out of your constant companion.

A phone’s poor external appearance can easily drop its resale value by $100, so making the effort to keep it new pays off. Here are some tips on protecting your phone.


1. Invest in Screen Protectors

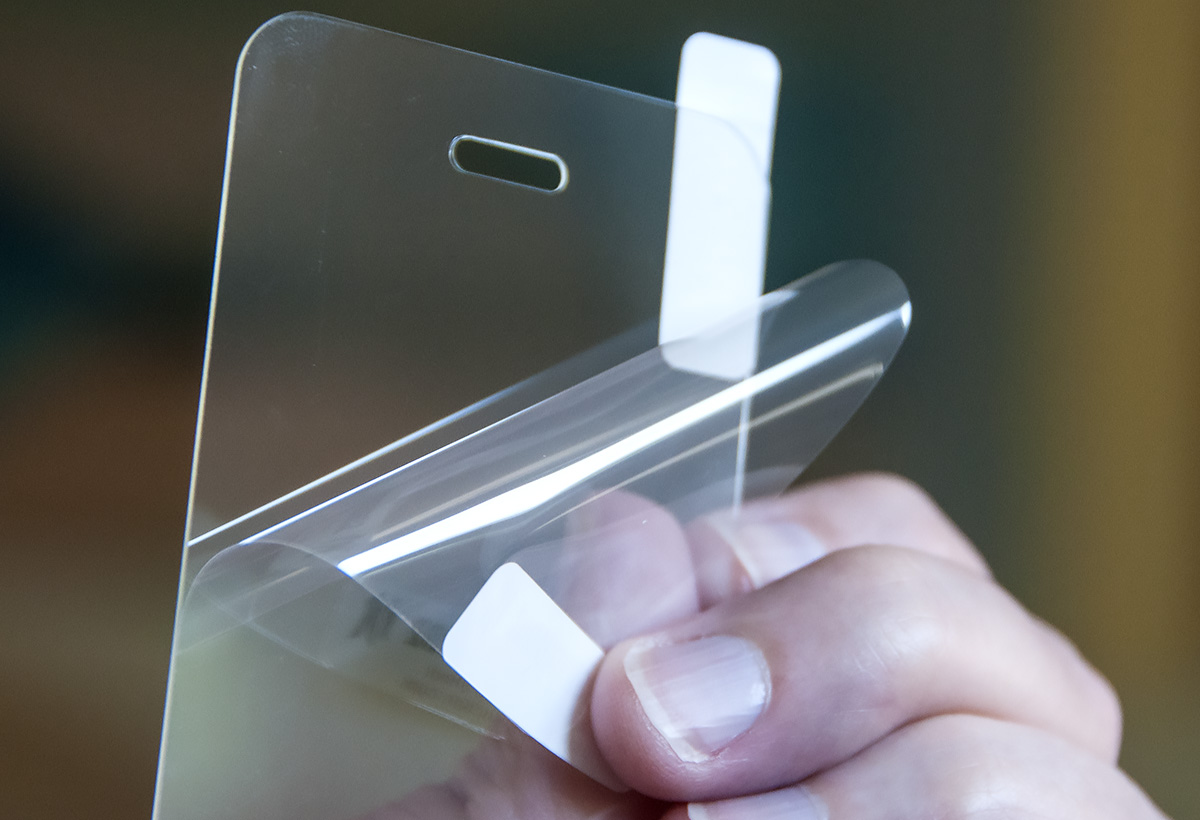
photo credit: charliewhite.net

Screen protectors cost $10 to $30 depending on the material they are made from. All styles protect your screen from every day wear, but the pricier models offer better protection from harder drops and impact. Screens pay themselves off quickly because even with care plans, including Apple Care, you still end up paying an additional fee for getting your screen replaced.

Screen protectors are easy to put on, especially the dry kind that only require a spotless screen. If you miss-align, you can try again. The wet style of screen protectors test your patience and are better left to the pros. If you don’t feel comfortable doing it yourself, get a cellphone store or mall kiosk to do it for you.

There are three kind of screen protectors, starting with the cheapest:

  • PET: Polyethylene terephthalate protectors, for older phones, to protect against light scratches but not hard, glass-shattering drops.
  • TPU: Thermoplastic polyurethane screen protectors perform better the PET, keeping away grease and fingerprints. They are self-healing when scratched. They absorb light drops, but don’t have the hard, glass feeling of original screens.
  • TG: Usually the best ones are made from tempered glass screen protectors. They have multiple layers including non-reflective hardened glass, are a fraction of a millimetre thick and will ultimately sacrifice themselves, shattering into pieces in the hardest drops, saving your original phone screen. Here you will find screen hardness ratings at 9H or more.

Gorilla Glass, featured in better phones, protects against impact – often demonstrated with hammers and nails, but it still scratches. If you are a beach bum, get a glass screen protector to keep sand away. Smartphone companies recommend that you use screen protectors in addition to cases. Some cases offer better value when they include a mid-level quality screen protector.


2. Buy A Good Smartphone Case


photo credit: gadgetreview.com

This is very important most especially if you travel a lot or if you are involved in sports or any other physically demanding activities. That said, in choosing the best smartphone accessories, how do you choose from thousands of phone cases? Before we get to that, here is the most important, overlooked detail you should check out in a phone case – its edge-to-edge screen access.

The sides of all cases go a little higher, slightly overlapping the screen, protecting it when the phone is placed upside down or when dropped on its corner. That little overlap varies in shape, thickness and how much of the screen edge it covers. Better cases pay attention to this detail; not getting in the way of your fingers as they touch the screen edges. Finger shapes vary; some won’t be able to properly touch the screen’s edge on thicker or wider case designs. When it comes to portholes, you have to check if it is wide enough for your smartphone charger to fit in. Some cases make the mistake of creating a slightly wider porthole thus giving you a hard time charging your phone using your ac wall charger, your dc car charger, or even your very own usb car charger. This is why its very important that you first try screen access on any case before you buy one.

With all that being said, here are four kinds of cases designed to progressively protect your smartphones against bumps, drops and unsuspected impacts.

  • Minimalist Cases: These ultra-slim, skin tight cases come in hard, soft plastic/rubber or leather. They are minimally invasive, but protect the least against drops.
    • Most minimalist smartphone cases are equipped with clear polycarbonate hard plastic for its exterior. They are usually used for showing off your new iPhone 6.
    • The thicker versions have a hard back shell and soft drop absorbing edges features non-slip strips across the back – great for counters and cars.
    • For leather cases there are features that include a microfibre interior and a thinly bonded shock-absorbing screen edge. The attention to protected buttons with even thinner leather oozes quality. Plus the feel and smell of pure leather just screams quality.
  • OtterBox Cases: Used to be a brand. But today it has become a household name that all iPhone users use for identifying smartphone case-types. These type of cases are very well-known for putting protection in front of style. These type of smartphone case features a one-piece hard shell bonded to an interior soft shock absorbing interior.
    • Symmetry-type OtterBox cases offers a two-piece is soft inside and hard outside and offers better protection and slightly more screen on the edges. It also comes with a screen protector.
    • The Defender-type OtterBox cases features a three-piece shell offering the best protection against the elements and impact.It has a built-in screen protector with a thin, water-tight membrane for the iPhone 6 touch fingerprint reader. The outer shell is a belt case.
  • Folio Cases: These cases are usually used for large screen phones and they mostly feature a smaller window on the front flap showing quick views of time, weather and (depending on the smartphone model) the ability to make phone calls without opening the front cover. This type of smartphone case has an exterior made from decent faux leather and and interior made from high-quality suede fabric. These cases also feature a reflective window that acts as a mirror when the phone is turned off.
  • Grip Cases: This type of smartphone casing are the types of smartphone cases for the dashing and daring of smartphone users. These are usually chosen by users that knows a thing or two when it comes to smartphone caution and care. Grip cases doesn't have all those fuzzy details like an otterbox or a folio case but it offers a slightly better protective feature compared to minimalist cases like:
    • The power battery grip cases. These types of grip cases features a built-in 2,000 mAh chargeable battery, which doubles your usable time. It is graspable not only effectively graspable but it also protects your phone against wear. It offers a full button protection and charges the inserted iPhone or smartphone with an external, cheaper micro-USB cable.
    • The exoskeleton grip cases has a feather-lite, one-piece aluminum-machined body with an easily accessible bottom slot and inside cushion pads. The creation of these exoskeleton grip case was inspired the honeycomb shapes seen inside beehives. Not to mention, the exoskeleton grip case is currently the toughest case (material-wise) for the iPhone and when inserted, only adds less than a penny in dimension thickness.

3. Choose High Quality Smartphone Charging Accessories

photo credit:makingsmilesonline.com

Not only is it important for you to take care of your smartphone's exterior facade but it is as equally important to take care of your smartphone's internal battery as well. A good quality charging device doesn't only allow you to save efficient time in charging speed but it would also allow you to enjoy your smartphone for longer periods of time. Other than authentic accessories you can buy for your smartphones, you can find a lot of dependable and high-quality ac wall chargers, dc car chargers, and usb chargers from independent companies that work as well as the ones found inside the iStore or tech shops in general. Not only that, you'd also be spending way less and still get the same satisfaction with your smartphone's battery life. What's important is that you choose quality accessories so you do not compromise on your expenses and your phone's safety.


Do you agree with these smartphone protection tips? Let your thoughts be heard in the comment section below. Also don't forget to share this helpful article with your family and friends on Facebook, Twitter, and Google+. Thanks!

-XoXo
post credit: globalnews.ca

17.12.14

Santa's New Roles for Your Silicone Baking Cups This Holiday Season

wondrouspics.com

Are our trusty silicone cupcake liners taking-on a new role outside the kitchen this holiday season? Well, why not? We already know what silicone cupcake liners are for. What it is made of and how it's being used in the kitchen is no rocket science. We all, at some point in our lives, have reaped the benefits on using cupcake liners for almost every occassion there is. So why not let these trusty cooking materials take a break from all the heat and batter, and switch it's role for the upcoming holiday season?

Here are fun ways you can use these silicone cupcake liners for the holiday season (other than baking duties of course):

1. Make Colorful Kids Soap  

snowfern-clover.blogspot.com

Yes you can! Silicone muffin cups are great for moulding a lot of things most especially soap. Try making one for your family or if you feel generous enough, set aside a few to be given away as Christmas gifts for your friend's children to enjoy on holiday bath time!

2. Use as A Mise en Place

seriouseats.com

Many people use silicone baking cups as an instant substitute for a mise en place. If you happen to just discover this than thank your lucky stars as  you'll never get tired of  using them in the many food-preparation ventures of your life!

3. Replacements for Old and Boring Serving Bowls

wireservice.co

Not only is this possible but you are allowed too! The sky is the limit when it comes to using these delightful kitchen gadgets. Replace your old and boring serving bowls and take out your silicone baking cups to present a more colorful and vibrant dish that your guests would easily grab and enjoy this holiday season.

4. Your Child's Plaything

bringinmamahome.com

You don't have to be gender-conscious on this one. Who could afford to be? Most especially if you are a mother with two or more toddlers running around the house. Need a quick time off to gather yourself? Colorful cupcake liners might do just the trick! And don't you worry about safety, silicone cupcake liners are not only durable but they are also safe for a teething baby.

5. Christmas Ornament

jenniferperkins.com

Whoever came up with the idea of using silicone baking cups as Christmas ornaments is a sheer genius! Who would have thought that these colorful baking materials could also work well on a Christmas tree? 


With that being said, what are your thoughts on taking-out these delightful baking materials and giving it a well-deserved holiday break? Well? Don't just stand there and let your silicone cups collect dust! Give these tips a try and don't forget to share your thoughts in the comment section below!


-XoXo

8.12.14

The Peeling Test: Paper Liners or Silicone Liners

photo credit: siftandwhisk.com

We all grew up with paper cupcake liners that come in many colorful prints and shapes to lure us into remembering the products that they sell. These cupcake liners left us many stories to share with friends; some are funny and some are not so good at all. The problem with paper cupcake liners is that it's just not durable enough to stand the test of time because it is made of paper. Some companies even made thick and waterproof versions of these liners to make it fool proof to all the well-meaning and meticulous home bakers of the world.

At the turn of the century, we were all introduced to silicone cupcake liners and it got mixed reviews. It got high points for reusability and innovation; it also got low points when it comes to marketability and aftercare. Why? Because a lot of people failed to embrace the fad that silicone cupcake liners were able to provide in every household's baking necessities.

So we put it to the ultimate peeling test. Since we are all after the comfortability of using a cupcake liner. Who do you think bags the crown on this pressure test?


You are absolutely right! Instantly recognizing the most comfortable materials to use in baking cupcakes is no rocket science. The ease of access silicone cupcake liners bring to every household user are unquestionable. Still think that your trusty paper liner works best? Think again.

What are your thoughts on this subtle test? Are you a pro-silicone user? Send us your thoughts through commenting in the comment section below, and as always, don't forget to share this post to family and friends on Facebook and Twitter. Thanks!


-XoXo

Cookies Made Easy!


Cookie-baking is a simple task you'd easily enjoy doing most especially if you are still beginning to discover your hidden talent as a sweet baking genius. Cookies are great snack treats for your family and friends because you don't need too much fuzzy ingredients to be able to whip up something fancy for your guests to munch-on. Not only that, you also get to save tons of time in the kitchen while making your home spotless before guests arrive! How? Because when it comes baking cookies, you get to make dozens of them per batch in the oven. This means that while those cookies are baking in the oven, you can do all the welcoming on your right hand and still be able to balance your cookie tray on your left (talking about hitting three birds with one stone).

With all that being said, here's a quick recipe you can follow to create these fabulous cookies in a timely fashion.

Materials to Use:

  • Mixing Bowl
  • Measuring Spoons
  • Whisk
  • Sifter (Sieve)
  • Cookie Cutter
  • Spatula
  • Rolling Pin
  • Plastic Wrap
  • Baking Oven


Ingredients Needed:

  • 4 tbsp. Sugar
  • 1 tbsp. Cocoa powder
  • 9 tbsp. Cake flour (or plan flour)
  • 2 tbsp. Cornstarch (or Katakuriko)
  • 1 Egg yolk
  • 2 Drops Vanilla essence
  • 40 grms. Butter (room temp.)


Procedure

  1. In a mixing bowl, whisk together the softened butter and sugar.
  2. Add the egg yolk and 2 drops of vanilla essence.
  3. In a separate mixing bowl, measure dry ingredients using a measuring spoon, combine and sift using a sieve.
  4. Add the dry sifted ingredients to the mixing bowl with wet ingredients.
  5. Using a spatula, mix the combined ingredients until you get a crumbly consistency.
  6. Using your clean hands, Bring the combined mixture all together and wrap it using a plastic wrap.
  7. Allow your dough to rest and chill in the fridge for 15 minutes.
  8. After your dough has rested, take it out of the fridge and roll the dough out using a rolling pin until thickness reaches a quarter of an inch.
  9. Using a cookie cutter (or any material that can cut any form), cut out fun shapes your guests can enjoy.
  10. Bake in an oven preheated to 170℃ for 13-15 minutes.
  11. (Note: If making chocolate flavor, sift the cocoa together with the dry ingredients in Step 3.)
  12. For added appeal and flavor profile: Add icing, fruits, or any toppings you can think of to your cookie dough.

There you have it folks! A quick and easy cookie recipe you can share with family and friends! 


-XoXo

8 Time-Saving Lunch Box Tips


Let's face it -- back-to-school month is a lot like New Year's. Leading up to the first week, we are full of inspiration for a year of sending our kids to school perfectly coiffed in their new clothes, with their healthy-yet-creative lunches and not-yet-lost school supplies.

Then a week goes by, and the Stepford Mom urge gives way to reality. Imperfect, chaotic reality. After a few years of experiencing the inevitable back-to-school hangover, all mom cultivate the knowledge about realistically packing lunches. Here are some of top lunch box tips:

1. Pack what you're taking to work. This is an extension of my one-meal-three-ways philosophy, which involves creating one meal that can accommodate adults, kids and babies. It's a lot easier to pack school lunches while packing your own (especially when packing leftovers.)

2. When uninspired, use finger foods! Finger Food Friday is a huge hit with my kids and gives me a break at the end of a long week. It can be carrot sticks with hummus, celery with cream cheese, fruit with yogurt dip or salami and cheese with crackers. The idea is a snack tray for lunch.

3. Themes. You can find fun in themes while packing Sunday's leftover veggie quiche. For this Sunday's venture try to go with a French theme and tore off a piece of baguette, added a slice of brie, a cluster of grapes and a piece of chocolate. Voila!

4. Breakfast for lunch. Pack an individual yogurt with granola, fruit and a hard-boiled egg. For a quick time-saving tip, scramble eggs and bacon and put them in a Thermos.

5. Pack a Thermos. Leftovers are truly the easiest, no-brainer lunch to pack. Always try to make extras for lunch. If your kids are opposed to leftovers (some really do not want what they had the night before), freeze the leftovers in a container and use for another day. Stock your freezer with single-serve leftovers, which you can thaw in the morning before school and pop in a Thermos.

6. Batch baking. On Sunday mornings, make a couple dozen of the kids' favorite muffins to put in the freezer for lunches. You can put one in every other day for their morning snack.

7. More is more! While less is usually more, when it comes to packing kids lunches, the philosophy does not apply. They go through sporadic growth spurts and it is important that we always ensure that they have enough food for the day. Throw in an extra apple, granola bar, milk or bag of cut veggies if you notice your child is demolishing their lunch every day.

8. For more clean and organized lunchbox, try organizing all your preparations with the use of silicone baking cups for added ease in compartmentalizing and cleaning.


-XoXo
post credit: huffingtonpost.ca

5.12.14

Makeup Simplified: Mastering the No-Makeup Makeup Look

photo credit: thetruecare.com

We’ve seen it everywhere from runways to magazine covers—the no-makeup makeup look. The concept is simple: makeup that complements your features, without it looking like you are actually wearing any at all.

The focus is on perfecting the skin, so start with concealing any blemishes. Use a yellow-based concealer to cover any red or purple color around the eyes. Next, find a foundation that matches your skin tone. You don’t want to guess when it comes to finding the right color, so test shades on your skin before making a purchase. When it comes to the foundation texture, keep in mind the needs of your skin. If your skin is dry, look for a hydrating foundation; If you are more on the oily side, look for a matte foundation. Simple right?

For your cheeks, aim for a shade that matches the natural flush you get when you pinch your cheeks. You’ll want to gently fill in your brows and skip the liner. Choose a taupe eye shadow and dust lightly on your lid—try one of the neutral options when choosing any tinting pigments. Top off the look with a lip color that is half a shade darker than your natural lip. If you go lighter, you’ll end up looking washed out.

It’s the kind of makeup that is really simple and makes you feel really good.

What's your take on the No-Makeup Makeup look? Let your thoughts be heard in the comment section below and don't forget to share your posts with family and friends on Facebook and Twitter. Thanks!


-XoXo
post credit: www.yahoo.com/beauty

Perfect Gifts for Smartphone Lovers

photo credit: brightpointcreativeinsights.com

With the festive season falling upon us, there are many who are already beginning to go into panic mode about what gifts to buy their loved ones this December. If you know someone who is something of a smartphone addict, we have the perfect present ideas for you.

Give the Gift of Cinema


The chances are that if your friend or family member spends a lot of time on their smartphone, they will be familiar with the various video features and apps that their device has to offer, such as Youtube and even Netflix, 4oD and BBC IPlayer.

A smartphone film projector is a great way in which they can watch their favourite clips and shows from their phone projected onto the wall, creating the ultimate smartphone cinema experience. You can purchase them for very little money too! Search for them online, being available for £15.99.

Trust us, they will be so grateful as they can sit back, relax and watch funny clips of pandas sneezing or cats running into glass doors in larger than life form.

Give the Gift of Power - Literally


Your smartphone-loving pal is likely to have come across the never ending nightmare that is the low battery and we can guarantee that they will absolutely love one of the many hilarious chargers you can buy now as a quirky little gift. One of our favourites are the tons of USB portable chargers you can find online. They can take the form of paper towel hubs, power banks, and even dining tables! These are great figts due to its sheer practicality as a, well. These things will charge any Apple or Samsung smartphone, or any really that use a USB cable.

Give the Gift of Smell


Make scented candles a thing of the past. We all know in this ever growing digital age, there is nothing that a smartphone can’t do, and if your text-loving friend is a fan of fragrance, there are tons of aroma diffusers out there that you can but and will be right up their street!

Just simply plug the diffuser into your smartphone’s headphone socket and you will then have the choice of five wonderful scent cartridges to use once you have synced your device up to it. Fill the air with lavender when you need to de-stress, or coffee when you could do with a quick pick-me-up.

Give the Gift of Memories


If you are looking for a more sentimental phone-based gift this Christmas, why not look to creating a personalised smartphone cover?

There are various places in which you can create covers that are filled with personal photographs for the iPhone range. Simply gather together a number of images that you know they will appreciate and treasure and send them over to be created. There are tons of site you can search that does personalized collages for you to print and give as a gift this holiday season.


What are your personal thoughts on this? Let's hear it by adding it to the comment section below. Don't forget to also share this with family and friends on Facebook and Twitter. Thanks!


-XoXo
post credit: mazumamobile.com

4.12.14

Art Jokes: You Must Be An Artist If...

A humorous look at the things you do that indicate you're an artist.


photo credit: wall321.com

What are the signs that you're an artist? This collection of definitions of what makes an artist started with a comment on the Painting Forum from Hamlet which got the rest of us going...! We're not telling which of these art jokes originated with us, nor how many definitions apply to us as well, except to say that all artists have never dunked a brush in their coffee... Yet!


  • You were more concerned about the color of your car than the fuel consumption.
  • The highlights in your hair are from your palette and not Clairol.
  • You are having lunch with the girls and the fragrance you wear is eau d'linseed oil.
  • The only piece of new furniture you have in your home is a $2000 easel.
  • You butter your toast with your fingers, just to feel its texture.
  • You think about taking a picture to a show.
  • You talk about going to a show where the pictures don't move.
  • You are over 50 and still have no health insurance.
  • Your family takes out a life insurance plan on you for less than $5000.
  • You know what shade of green the lichen on the trees is.
  • You can't find a nice outfit for your date because everything has paint smears on.
  • Your date ends up with paint smears on her/him.
  • You're late for the date because you suddenly knew exactly what that detail of your latest painting needed and just had to fix it while it was fresh in your mind.
  • You chose to buy that new Russian Sable Number Six Round instead of a Big Mac, a Large Fry, a Milkshake, Desert, and five gallons of gas.
  • Your favorite home repair store refuses to work with you to repaint your den, because you rename all of their paint swatches and you get upset that they don't carry the exact nuance of raw umber you had in mind.
  • You purchase a ton of books, and most are blank inside.
  • When viewing a sunset, you think in terms of cadmium yellow (light hue), salmon and gold, a tinted teal mixed with gold for the water...."
  • Strangers save your 'regular' spot at the park, perfect for observing children and pigeons.
  • There are Prussian blue fingerprints on your phone.
  • You stay awake late at night wondering how to render on canvas the dimly lit shapes and the shadows in your room.
  • When you go out, you are always stopping and gazing at the world around you.
  • You travel far to sketch a place of scenic beauty.
  • You clean your brushes in your coffee.
  • You carry pencils instead of pens.
  • You have watercolor swatches on cardboard in your pocket. 
  • You explain your deplorably bad housekeeping by saying, "it's a work-in-progress..."
  • You do judge a book by its cover.
  • You watch the latest kids' digital animation movies and drool over the effects as much as the story.
  • You bought paint instead of food!
  • You paint more than you talk.
  • You draw your letters instead of write them.
  • You like to get plastered and paint the town red.
  • You're in love ... with your studio.
  • You know that art does not match your sofa.
  • If dust bunnies are part of your mixed media.
  • You buy expensive brushes, and have nothing to do your hair with.
  • You get a feeling of calmness from holding and stroking the bristles of your clean paintbrushes.
  • When going on a quick errand in your painting cloths you're finding people rave over the 'fashion statement' you didn't even realize you were making.
  • You know the difference between beige, ecru, cream, off-white, and eggshell.
  • You know more than 28 colors.
  • You get excited about football season because it means your significant other will finally be sitting still on the sofa long enough for you to paint him.
  • At the gym you take note of the instense facial expressions of the heavy lifters.
  • You never look at a person's face as a whole. You break it up into shadows and lines and shapes, and think how they would look on a canvas.
  • When others are needing to be with the in crowd, you feel lost in the crowd.
  • You long to be alone with your thoughts while others are lonely without much thought.
You can read more about funny jokes about arts and artists here.

Aren't these jokes hilarious or what? If you find these jokes intertaining, congratulations you truly are an artist at heart! Don't forget to share this post with fellow artist and friends on Facebook and Twitter. Thanks!


-XoXo
post credit: about.com

Overcoming The Fear of a Blank Canvas

photo credit: spindelmaker.com

First the good news: you're not alone in this by any means. It happens because we want a painting to come out right; the fear that the result will not be what we imagine paralyzes us. It's also been a while since you've painted, so your skills are rusty; what you're doing now doesn't match what you know you're capable of and that's also inhibiting. It's also because we see our paintings as part of ourselves, not as product; we invest a piece of ourselves in them and want them all to be perfect, which is never going to be possible.

"The development of an imagined piece into an actual piece is a progression of decreasing possibilities, as each step in execution reduces further options by converting one -- and only one-- possibility into a reality. ... the piece you make is always one step removed from what you imagined... after all, your imagination is free to race a hundred works ahead, conceiving pieces you could and perhaps should and maybe one day will execute -- but not today, not in the piece at hand. All you can work on today is directly in front of you. ... art materials seduce us with their potential."

In terms of practical things to do, don't set out to do a finished, complete painting. Do small studies, say an apple and its shadow, a vase, a hand, or an eye. Something that can go wrong or be reworked many times because it's just a learning piece, not a 'real' painting.

With drawing you could take a piece of charcoal and cover the whole sheet, then rub it in with your hand. Then draw back in with a plastic eraser. By doing this you've already mucked up the whole sheet of paper before you start, so anything you do can only be an improvement.

If you've got some paintings you've done that you like, or like parts of, put these on display to remind yourself that you can do it. If you've done it once, you'll be able to do it again. Painting requires perseverance not talent.

Let's give Vincent van Gogh the last word on the issue of intimidating blank canvases:

"You do not know how paralyzing that staring of a blank canvas is. It says to the painter, you can't do anything ... Many painters are afraid of the blank canvas, but the blank canvas is afraid of the really passionate painter who is daring."

Are you ready to conquer your fear of a blank canvas?

What are your thoughts about the subject matter? Let your thoughts be heard by adding it to the comment section below. Also, don't forget to share this with family and friends on Facebook and Twitter. Thanks!


-XoXo
post credit:  about.com

Your Makeup Storage Collection Just Got Cutie-fied to the Level of Awesomeness!

photo credit: i covet thee

Why are you keeping your makeup in a junk drawer when organized bliss is within reach? These 10 hacks will help you find a way to keep your makeup and beauty products in order and looking cute.

1. Turn an Ugly Candle Glass Holder  to A Cute Storage Organizer!


There are tons of beauty bloggers out there that would teach you about revamping and maximizing the use of old ugly jars and turning it into a a wonderful thing of beauty! If you are wondering what jars to use, skip the mason ones and grab an empty candle jar to revamp and use for storing your makeup brushes. These things require a generous amount of glitter and patience.

2. Put Your Room's Shelves to Good Use


Your room's shelving is not only good for stacking up books and other ornaments in your home but you can use your room's shelving for stacking up your makeup and makeup brushes and tools.

3. Retrofy Andy Warhol Style!


If it bores you to stare at the usual clear glass holders you've been using for organizing your makeup brushes, tools, and pencils, go ahead and replace those boring compartments with vintage items such as old Campbell's soup cans and give your own space it's own personality and artistic flare.

4. Reuse Odd Household Items You Have Been Hiding


If these 'odd' household items you have been keeping has never seen the light of day for quite some time already, it's probably best to take them out and use them for organizing your materials. After all, no one's stopping you from getting inspired. Who says  you can't use and old floor brush for organizing all your makeup brushes?

5. Put Stuff On Your Walls


We're smart beings. People can sniff inspiration when they see one. Add little shelves you can custom build and hang on your walls such as old and sturdy picture frames you can later on use for stacking those wonderful nail polish collection collecting dust in your drawer.

6. Mojo Mason Jars


This is arguable. Some people would stop you from using mason jars for organizing purposes but when inspiration strikes, refusal is futile. You may have never given it too much thought for using it as a 'non-food' storing item but when you see all your tools all stacked up and organized, things will fall into perfect sense.

7. Shoe Racks are Good for Organizing Too!


At some point in your life, you too gave-in to the popular use of portable shoe racks when you were still in college getting your first apartment. They may, at that time, not have shown convenience on your part since it can easily become an eye sore at the back of your door waiting to happen but the clear plastic covering of these shoe racks makes wading through oceans of makeup pencils, brushes, and other essential makeup materials easy.

8. No-Guilt Hands on the Cookie Jar!


Since we are all about innovation and seeking unconventional ways to store makeup, why not dip your hands inside the cookie jar and pull out nail polishes too pretty to hide away from public eyes. Not only will you have a breeze choosing colors for your next nail polishing ventures but the colors would also add up to your designs overall aesthetic appeal.


9. Bundt Pans Are Not For Pastries Alone


Who would have thought that those bundt pans collecting dust at the bottom of your kitchen drawers can also be used as a cool way for storing quick grab makeup materials you use every day.

10. Move Over Magneto!


This hack clearly may never have occurred to you but you can use magnets to your heart's creative delight and kick it to overdrive using your very own makeup materials. If you have way too much products you are finding hard to keep, thank your lucky stars cause this is a solution to this subtle confusion! You can pull this off by making your very own custom-made magnetic walls that could pretty much become a conversation starter to all friends visiting your makeup nook! There. Consider yourself informed! You're welcome.


What are your thoughts on all these storage organizing beautification hack? Let your thoughts be heard by adding them on the comment section below. Also, don't forget to share this post with family and friends on Facebook and Twitter. Thanks!


-XoXo
post credit: thegloss.com

3.12.14

Contour Pale Skin With These Simple Makeup Tips & Tutorials


All the cool beauty bloggers are talking about contouring lately, and there is an appeal to looking as chiseled as Kim Kardashian, or Angelina Jolie in Maleficent. But so many bronzers and contouring palettes and tutorials involve products and tips for medium-toned skin that can look artfully sculpted with just a touch of bronzer. Any super pale person knows that rubbing on bronzer like that will just make her look dirty at best, and covered in fake makeup at worst. And it’s tough to find a highlighter that works when everything in the store is darker than your actual skin tone.

But just because you’re pale doesn’t mean you can’t sculpt some sharper cheekbones. Here are 12 excellent contouring tips and products that will make even the palest people look like Maleficent.

1. Contouring & Highlighting Basics


It's very important to first know the basics of contouring and highlighting. Practice is key on this tip. For a better guided tutorial on how to successfully do your own contouring and highlighting watch the video above and learn more about adding vamp to pale skin.

2. Face Contouring Powder


There are two types of contouring products, cream and powder. For beginners it's best to start with powder-based contouring makeup so you'd know how to contour your face without overdoing it.

3. Don't Forget Your Legs!


You might zoom in on contouring your face and forget that our legs too needs contouring for a more even look.

Tip: If you are a woman of natural volume, you'll realize that contouring your legs would make you look slimmer and sexier too! 

4. Skip the Bronzer


Bronzers are great for the summer but including it in your daily makeup routing would tend to make you look dirty (It's a luck all pale-skinned woman dread so much).

5. Opt for Creamy Pigments


Creamy pigments are great for people with pale skin. Not only do they even-out complexion but  it gives you the opposite effect of using a bronzer; a clean healthy looking skin

6. Use Two-Toned Palettes


Whether you be using Tom Ford's illuminating makeup or a trusted makeup brand you just picked up in the drugstore, do know that two-toned contouring makeup products will give depth to pale-looking skin.


7. Contouring Blush Makeup


Cheeks are everything when it comes to contouring your face. You get to decide whether to go all natural-looking or a full on chiseled look worthy of fashion runways.


8. Make A Visual Map of Your Face


Clueless as to where makeup goes? Creating a visual map on your face is a convenient way for you to know every curves on your face and save yourself countless hours figuring out where to do your contouring, blushing, and highlighting. 

9. Additional Tips on Highlighting and Contouring for Pale Skin


Thanks to beauty bloggers, doing your own makeup becomes easy as counting peas in a pod.

10. Highlighting and Contouring Different Face Shapes


Not all tutorials online can show you how to highlight and contour your face. You must know that there are different techniques on blending for different face shapes and skin types.


11. Use A Good Contour Brush


Some people use their hands and that's fine. But to achieve full-on flawless effect of your contouring ventures, it's best that you use a good contour brush.

12. Highlighting and Contouring for Different Hair Colors


And of course, you must also consider the color of your hair so tho match with that cute little face of yours.


Go ahead! Pick out your trusty makeup brush and blend your pale looking skin to a livelier and lovelier you!


- XoXo
post credit: thegloss.com

10 First World Makeup Problems That Everyone Can Relate To, According To Reddit

photo credit: jennifershultzstyle.com

Even though Reddit tends to be a bit of a boys’ club, you'll find yourself falling deeper and deeper in love with its community of makeup-obsessed ladies. Any time you’re searching for beauty advice (or just for someone to vent your lipstick-related frustrations to), r/makeupaddiction is the place to be. Today, they’re discussing their first world makeup problems. The whole thread is worth a read, but if you only have time for the highlights, here are 10 enjoyable posts you'd!

1. "That I only have one set of lips on my face."


This might be a confusing statement to people who enjoy having normal facial features, but everyone who collects lip products understands norimw’s pain. It’s hard to look at a drawer full of a hundred different lipsticks and know that you only get to wear one today.

2. "I have so much stuff I never hit pan on anything, and for liquids, they expire before I finish them."


It’s really hard having tons of products available to you at all times, okay? It’s like having a table full of Thanksgiving dinner and only being able to eat one little plate.

3. "All my brushes and sponges don’t clean themselves."


This feeling is something all women can relate to. Who has the time to be diligent about makeup hygiene? Even famous painters had interns sitting around to wash their brushes for them. We should all get interns.

4. "I have so many eyeshadows and I can’t figure out a look that requires more than three."


That’s when you start mixing all the colors together until you’re wearing about 50 layers of shadows that just end up looking brown. That’s what kids do with Easter egg dyes.

5. "My eyelashes are so long that they touch my brow bone. Sometimes they leave little flakes up there."


Mascara flakes are the worst. Other than that, though, it kinda gives people a hard time feeling bad for people whose lashes are naturally long and curly. Lucky bastards.

6. "I have too many pretty lipsticks I love that none of them get worn enough. I started just wearing lipstick at night when I’m hanging out at home in my pajamas. My boyfriend thinks it’s weird, but whatever. Every time I catch a glimpse of myself in the mirror with killer lipstick, I feel awesome."


This is debatable. It's not all weird per se. Many women tend to wear lipstick when doing household chores such as vacuuming or making dinner (more often than they wear it out). Who has the energy to worry about what other people think of her lips? Wear it for you!

7. "I keep buying lipsticks in shades that I already own. Like, do I really need every variation of hot pink that MAC puts out? Yes."


Women with enough bottles of burgundy nail polish to paint a whole minivan would would cosign to this.

8. "Depotting feels like writing in textbooks. I know it probably is super useful but I can’t bring myself to mess with the natural order of things."


Mix-and-match palettes are a great idea in theory, but something just feels so wrong when you start playing god. After all, who wants to be the Frankenstein eyeshadows? Get a palette that's perfect enough for you to not think of changing anything.

9. "I had all my eyeshadow palettes successfully crammed into one small bento box, and then Tarte had to come along with its stupid fall palette that’s TOO WIDE and therefore has to get tucked between the wall and the bento. UGH."


THE TORTURE.

10. "All 50 of my brushes are dirty so I guess I’ll go buy more."


Yep. This same logic applies to underwear (why do laundry when you can make your dresser overflow with new panties?) and hair bobby pins (why store them in a reasonable place when you can just litter them around my bathroom and buy more?).


What are your thoughts on these funny thoughts? You have some lines to share? Let your thoughts be seen in the comment section below and don't forget to share this post with family and friends on Facebook and Twitter. Thanks!


-XoXo
post credit: thegloss.com